Team Management - Permission Management
In a customer service system, beyond administrators and regular agent accounts, you may sometimes need to create custom permission roles. QIABOT supports custom role creation and permission configuration, helping accounts become more professional and segmented while preventing permission misuse.
How to create custom permission roles in the system?
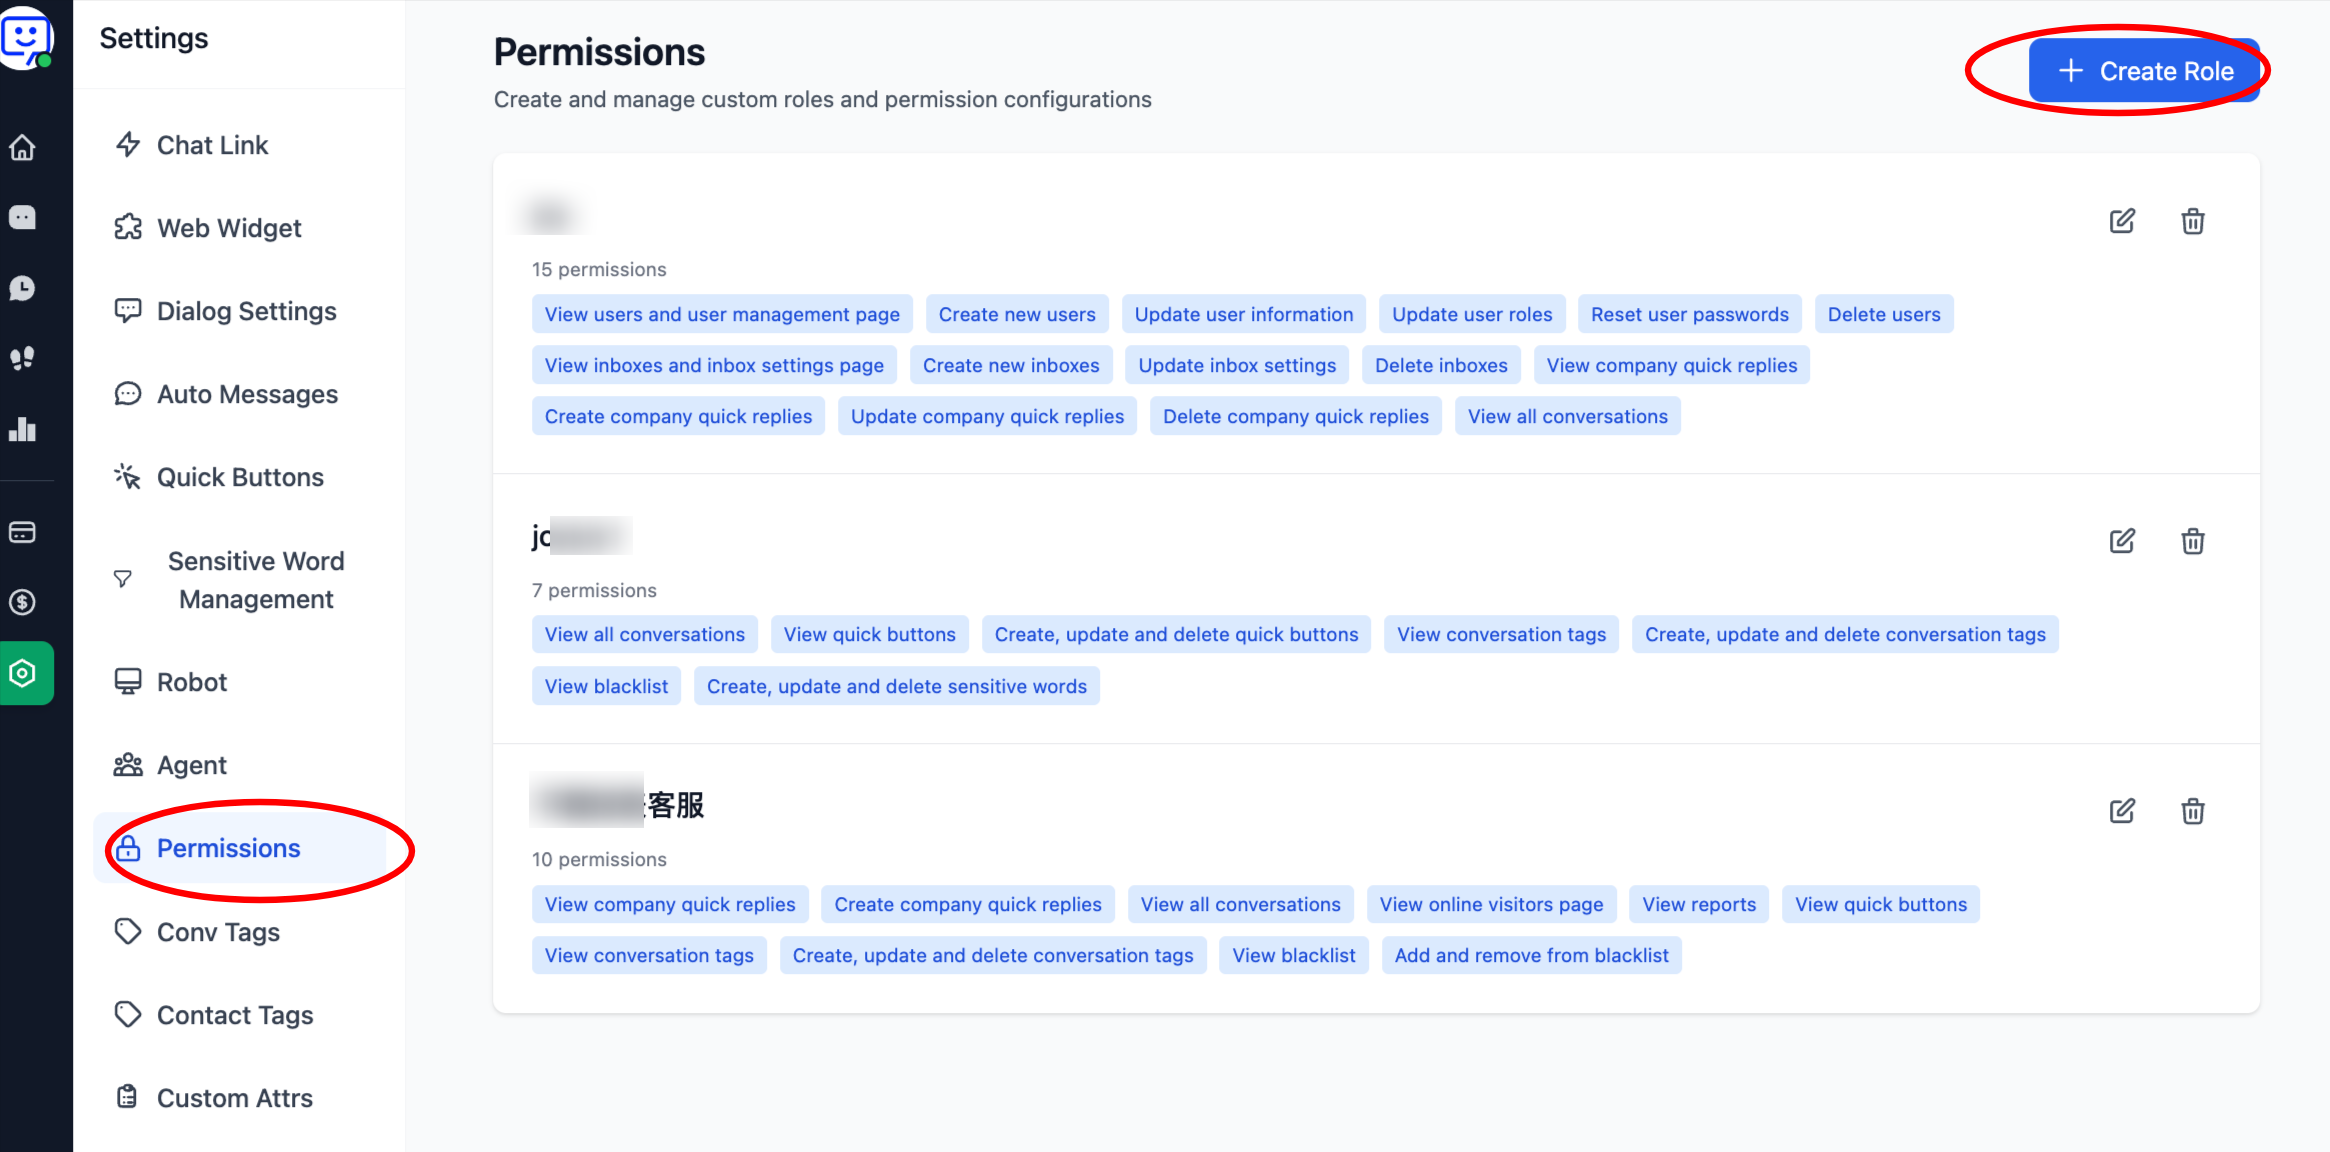
1.Create a role: Click "Settings" at the bottom of the left navigation bar, then select "Permission Management". Click "Create Role".
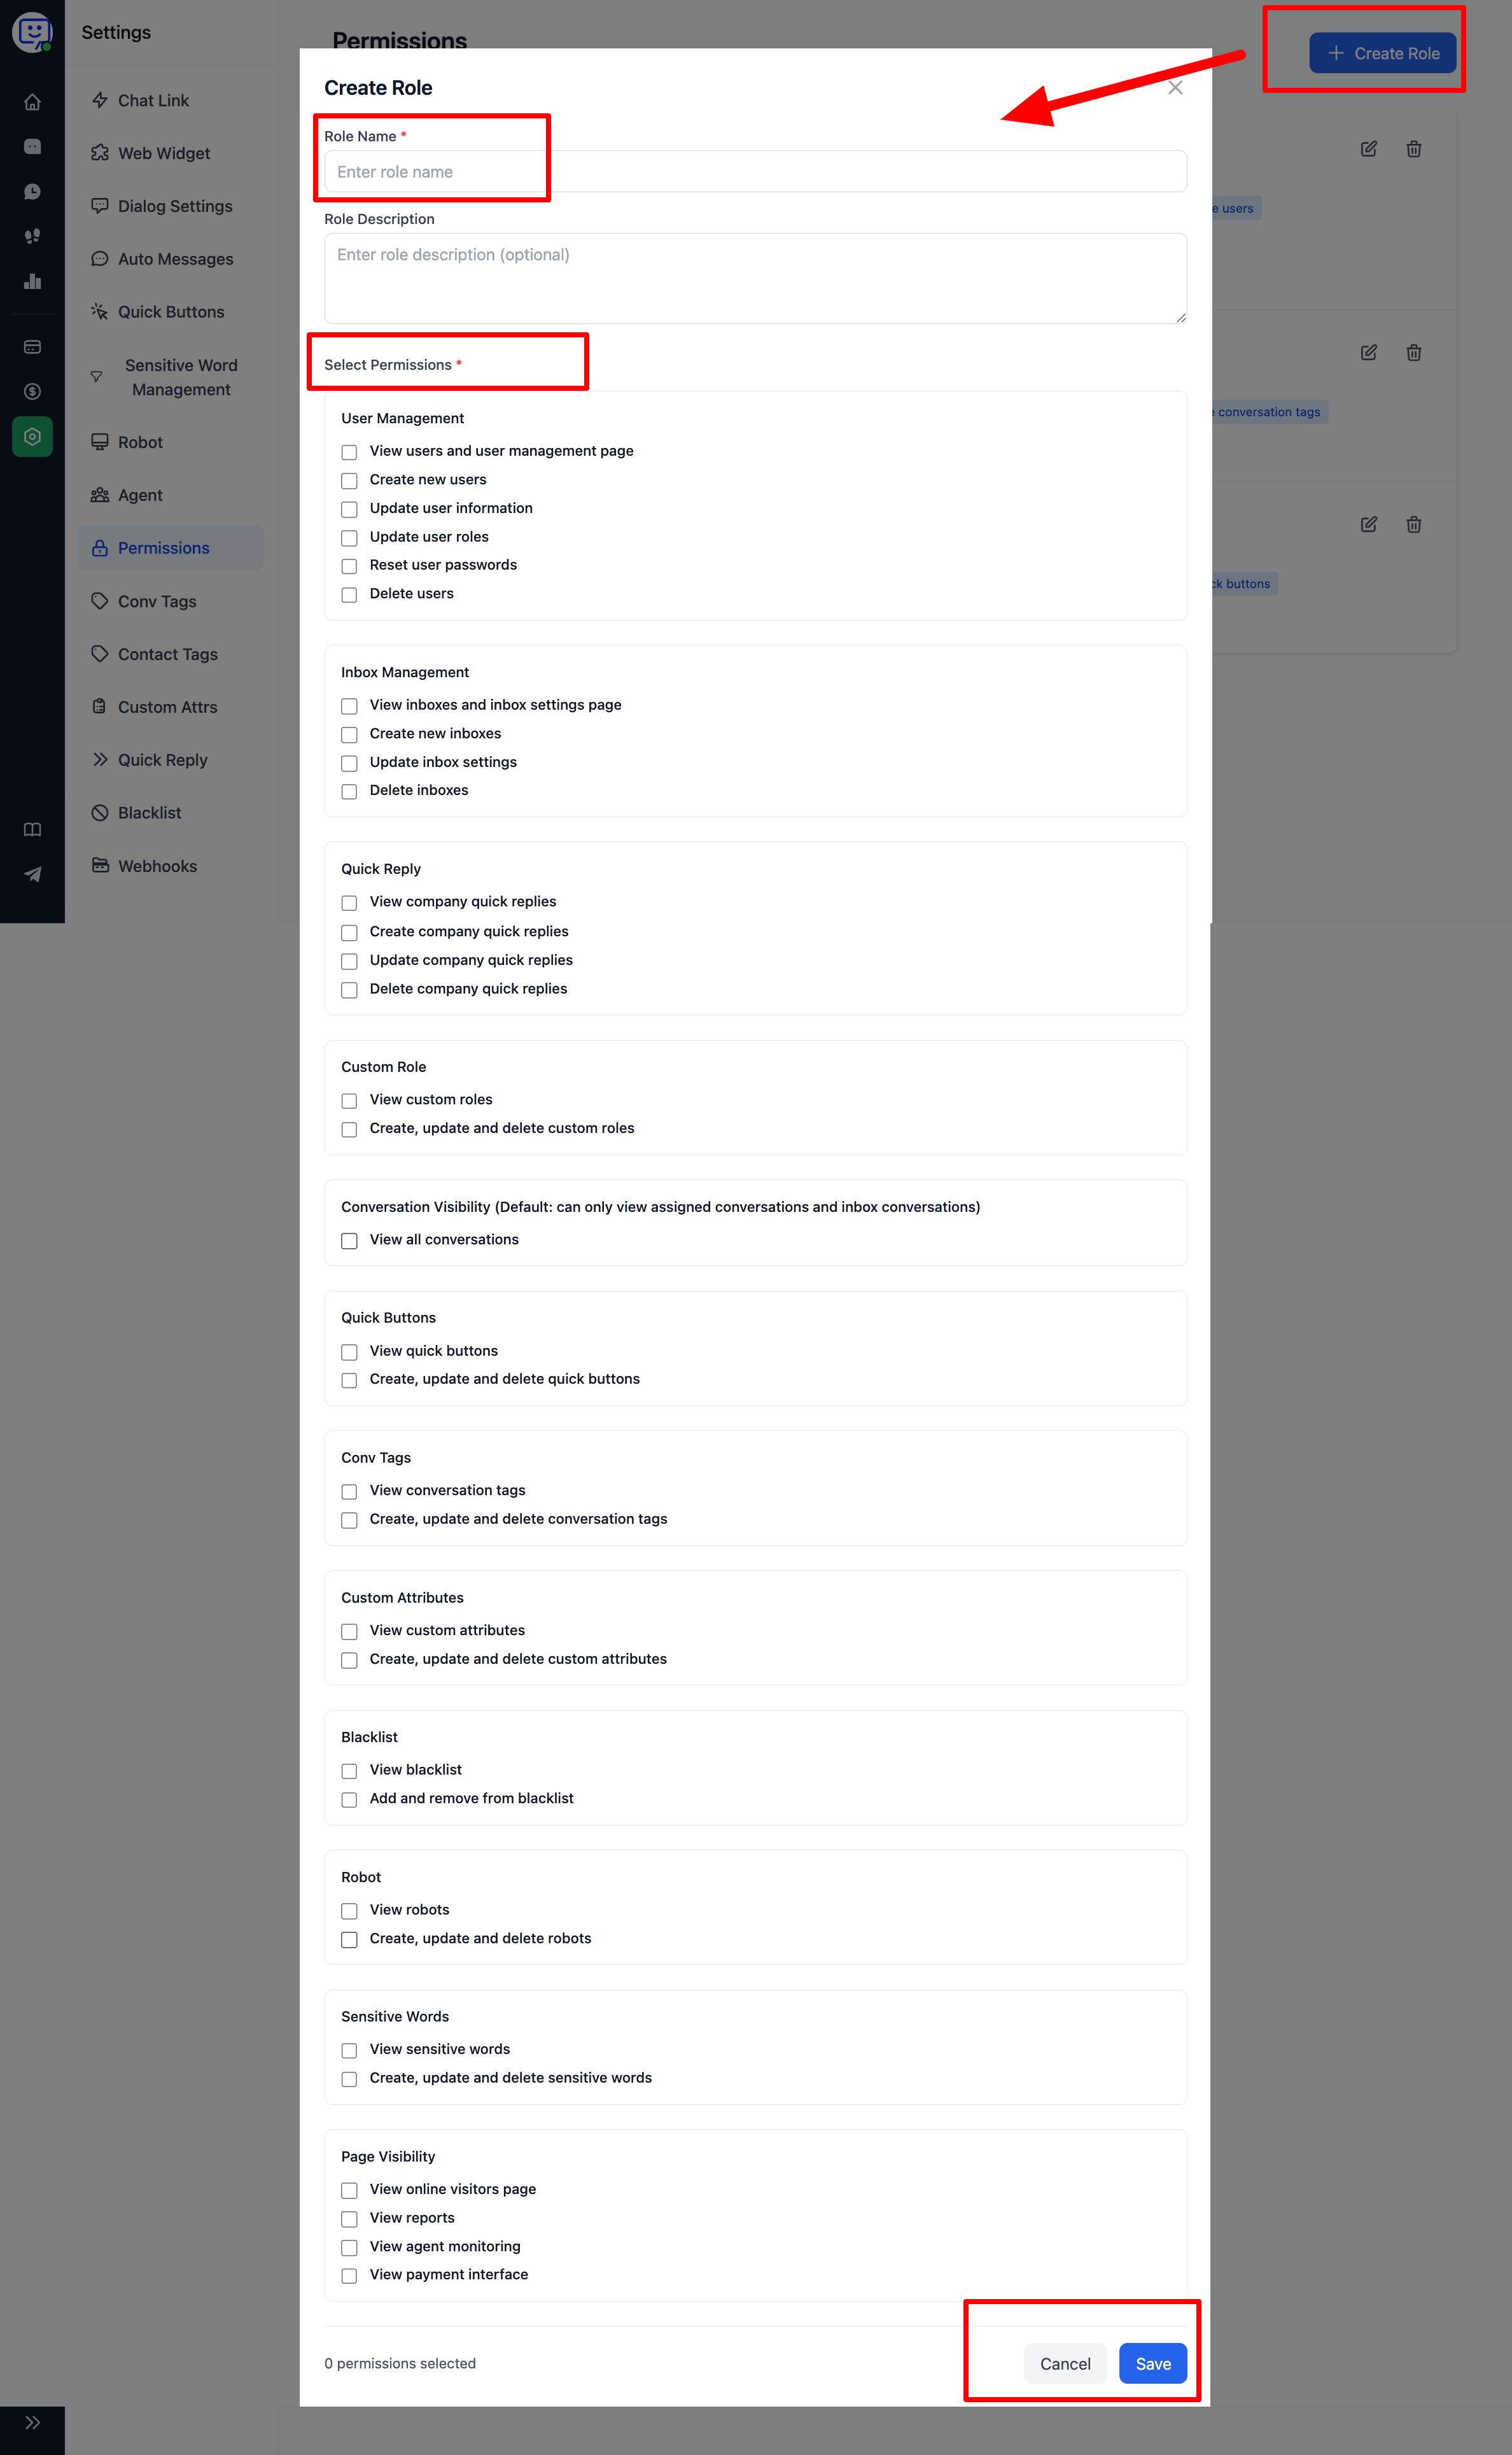
2.In the popup, enter the role name and description, then check the permissions needed for this role based on your requirements:
How to use these roles?
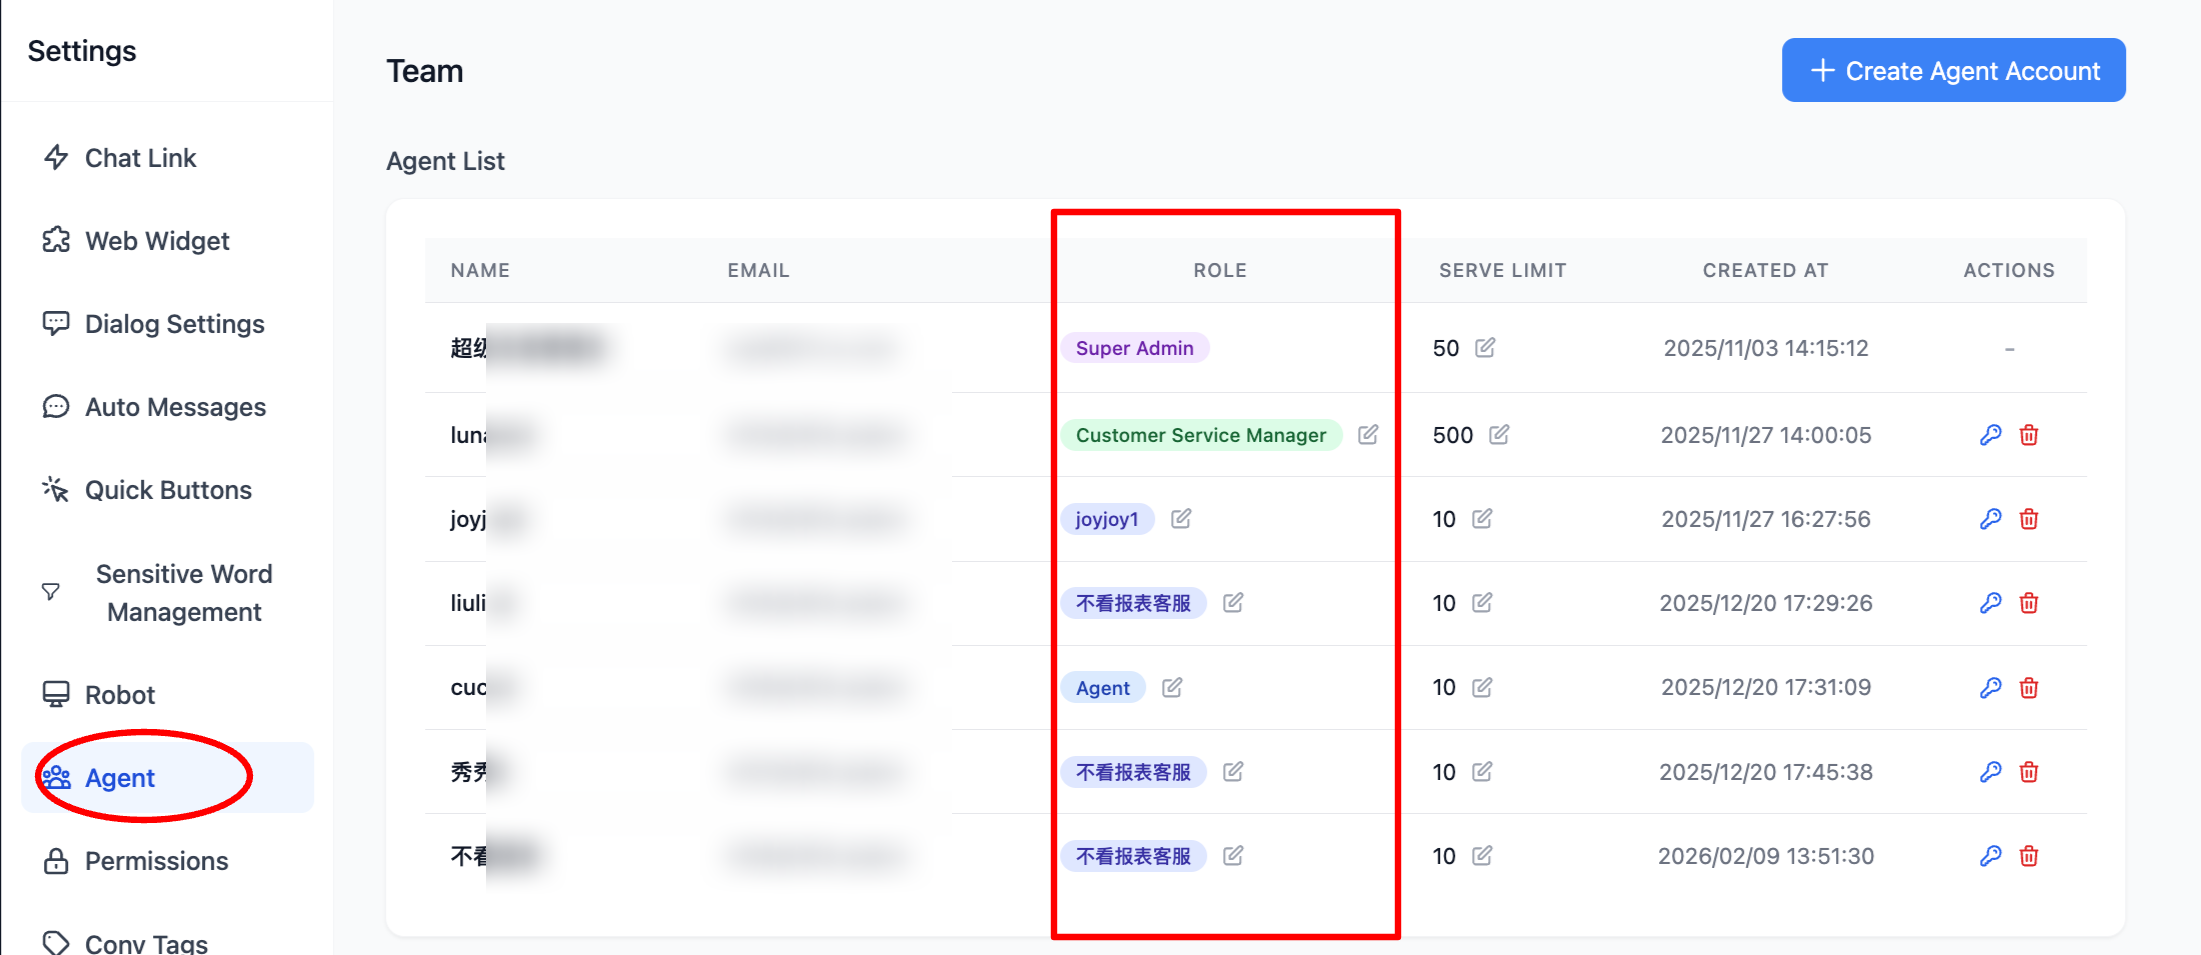
- Go to "Settings" > "Agent Management", select "Add Agent Account", then in the popup click "Role" and choose the custom role you previously created.
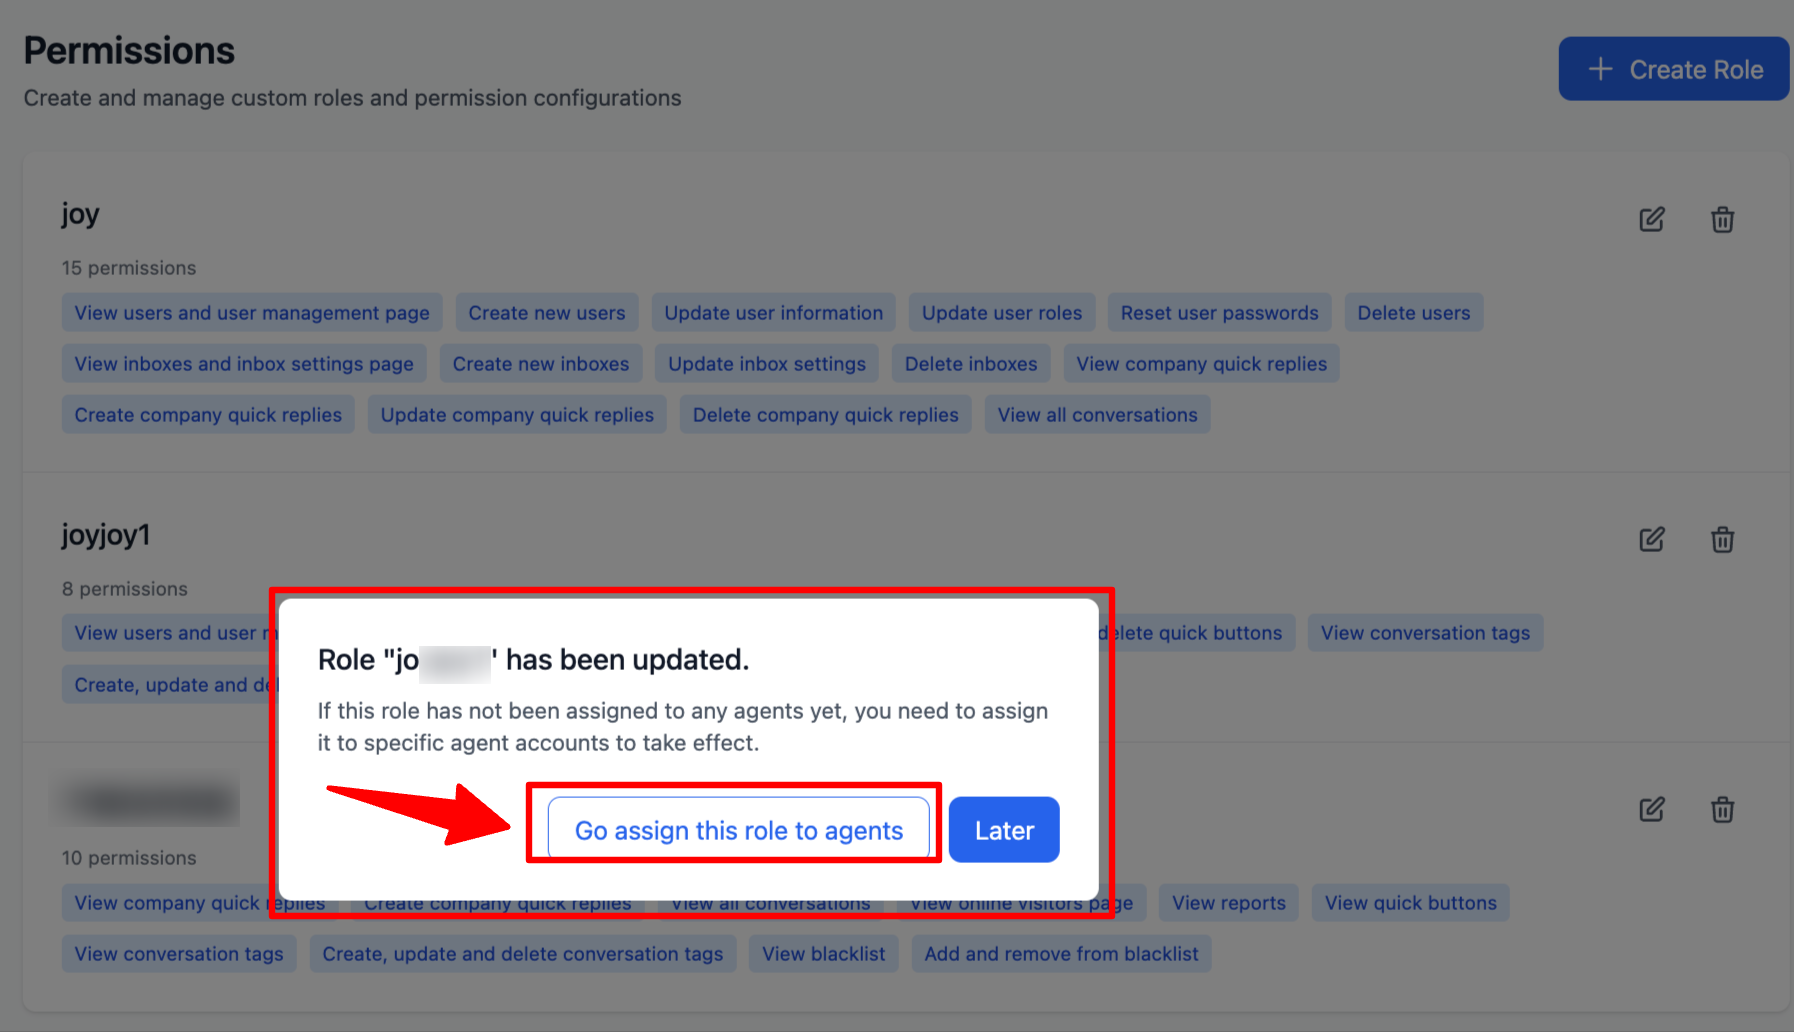
🎉 New feature! You can now jump directly from the "Permission Management" page to the "Agent Management" page to assign newly created permission roles to agent accounts!
🎉 Congratulations! You have completed the "Permission Management" module!
Through this module, you can flexibly configure permissions, granting different accounts different levels of access. This helps avoid situations where insufficient permissions prevent effective use of features, or where excessive permissions lead to accidental misoperations.