Qiabot Getting Started Guide
Follow this guide to register your account, create a chat link, and complete your first conversation with a visitor.
Step 1: How to Register
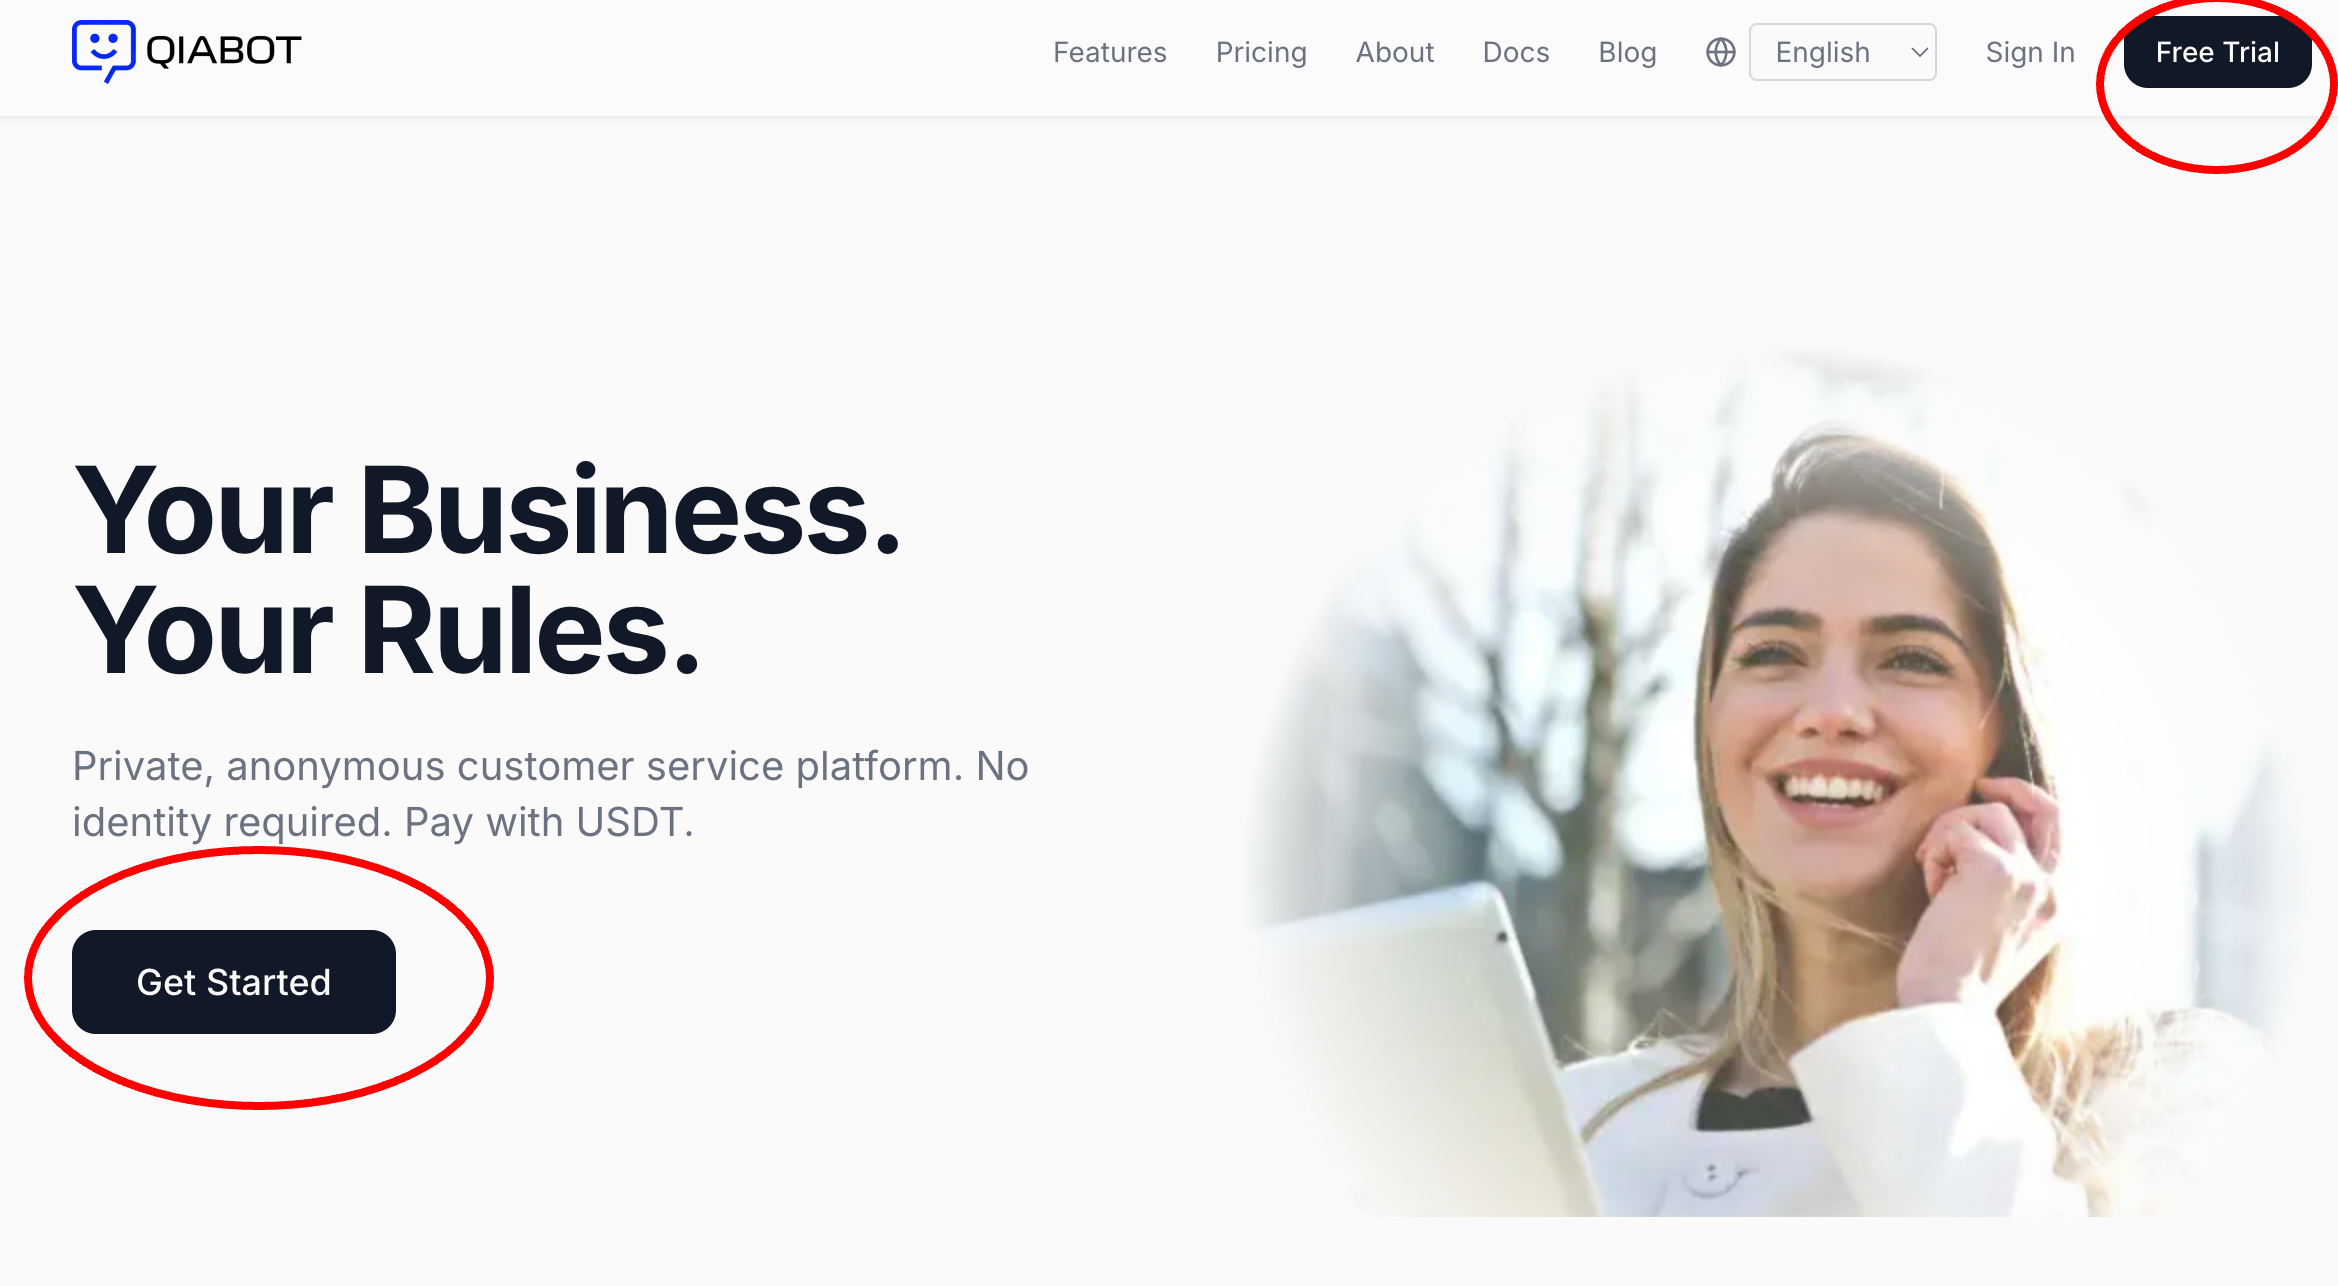
Let's begin with the first step — visit the Qiabot website and create your account.
1.Go to https://qiabot.com/ and click "Get Started" to start your free trial.
2.On the registration page, enter your email address and set a password. If you have a sales representative, you can enter their referral code. Once done, your Qiabot account is ready.
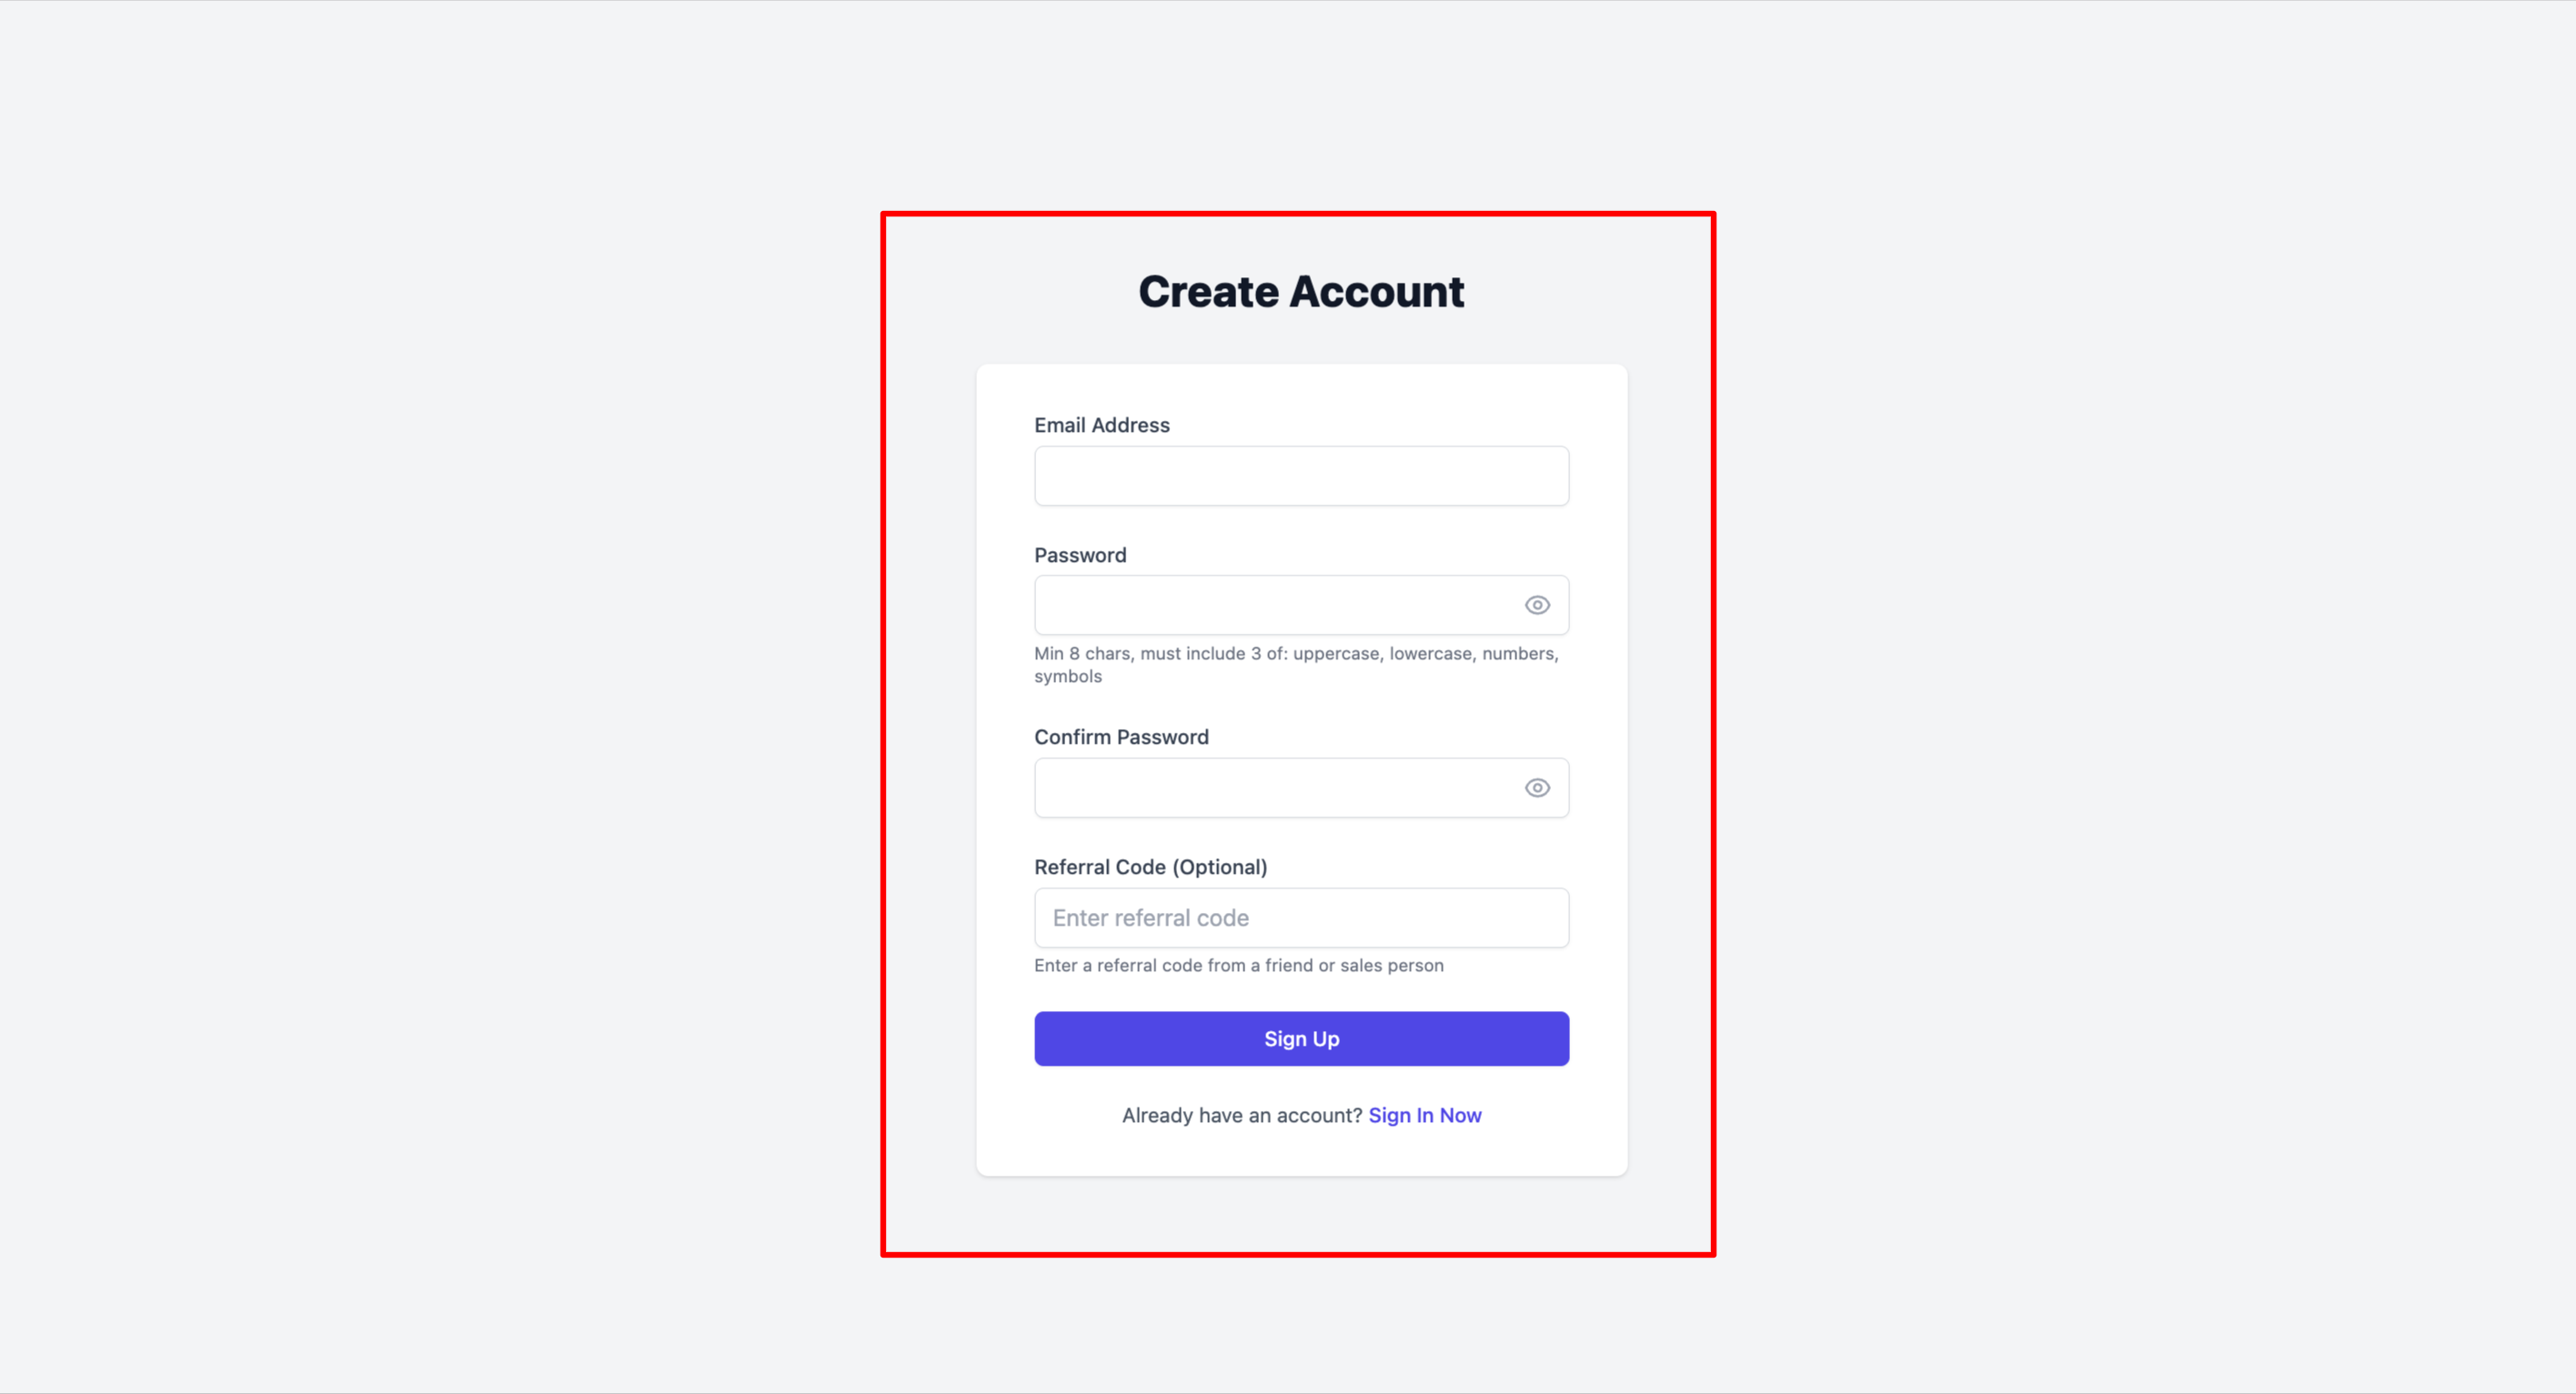
Note ⚠️: The free trial supports up to 20 conversations. To increase the conversation limit or add more agent seats, please contact sales.
Step 2: Set Up Your Account
After registering, you can configure your account information.
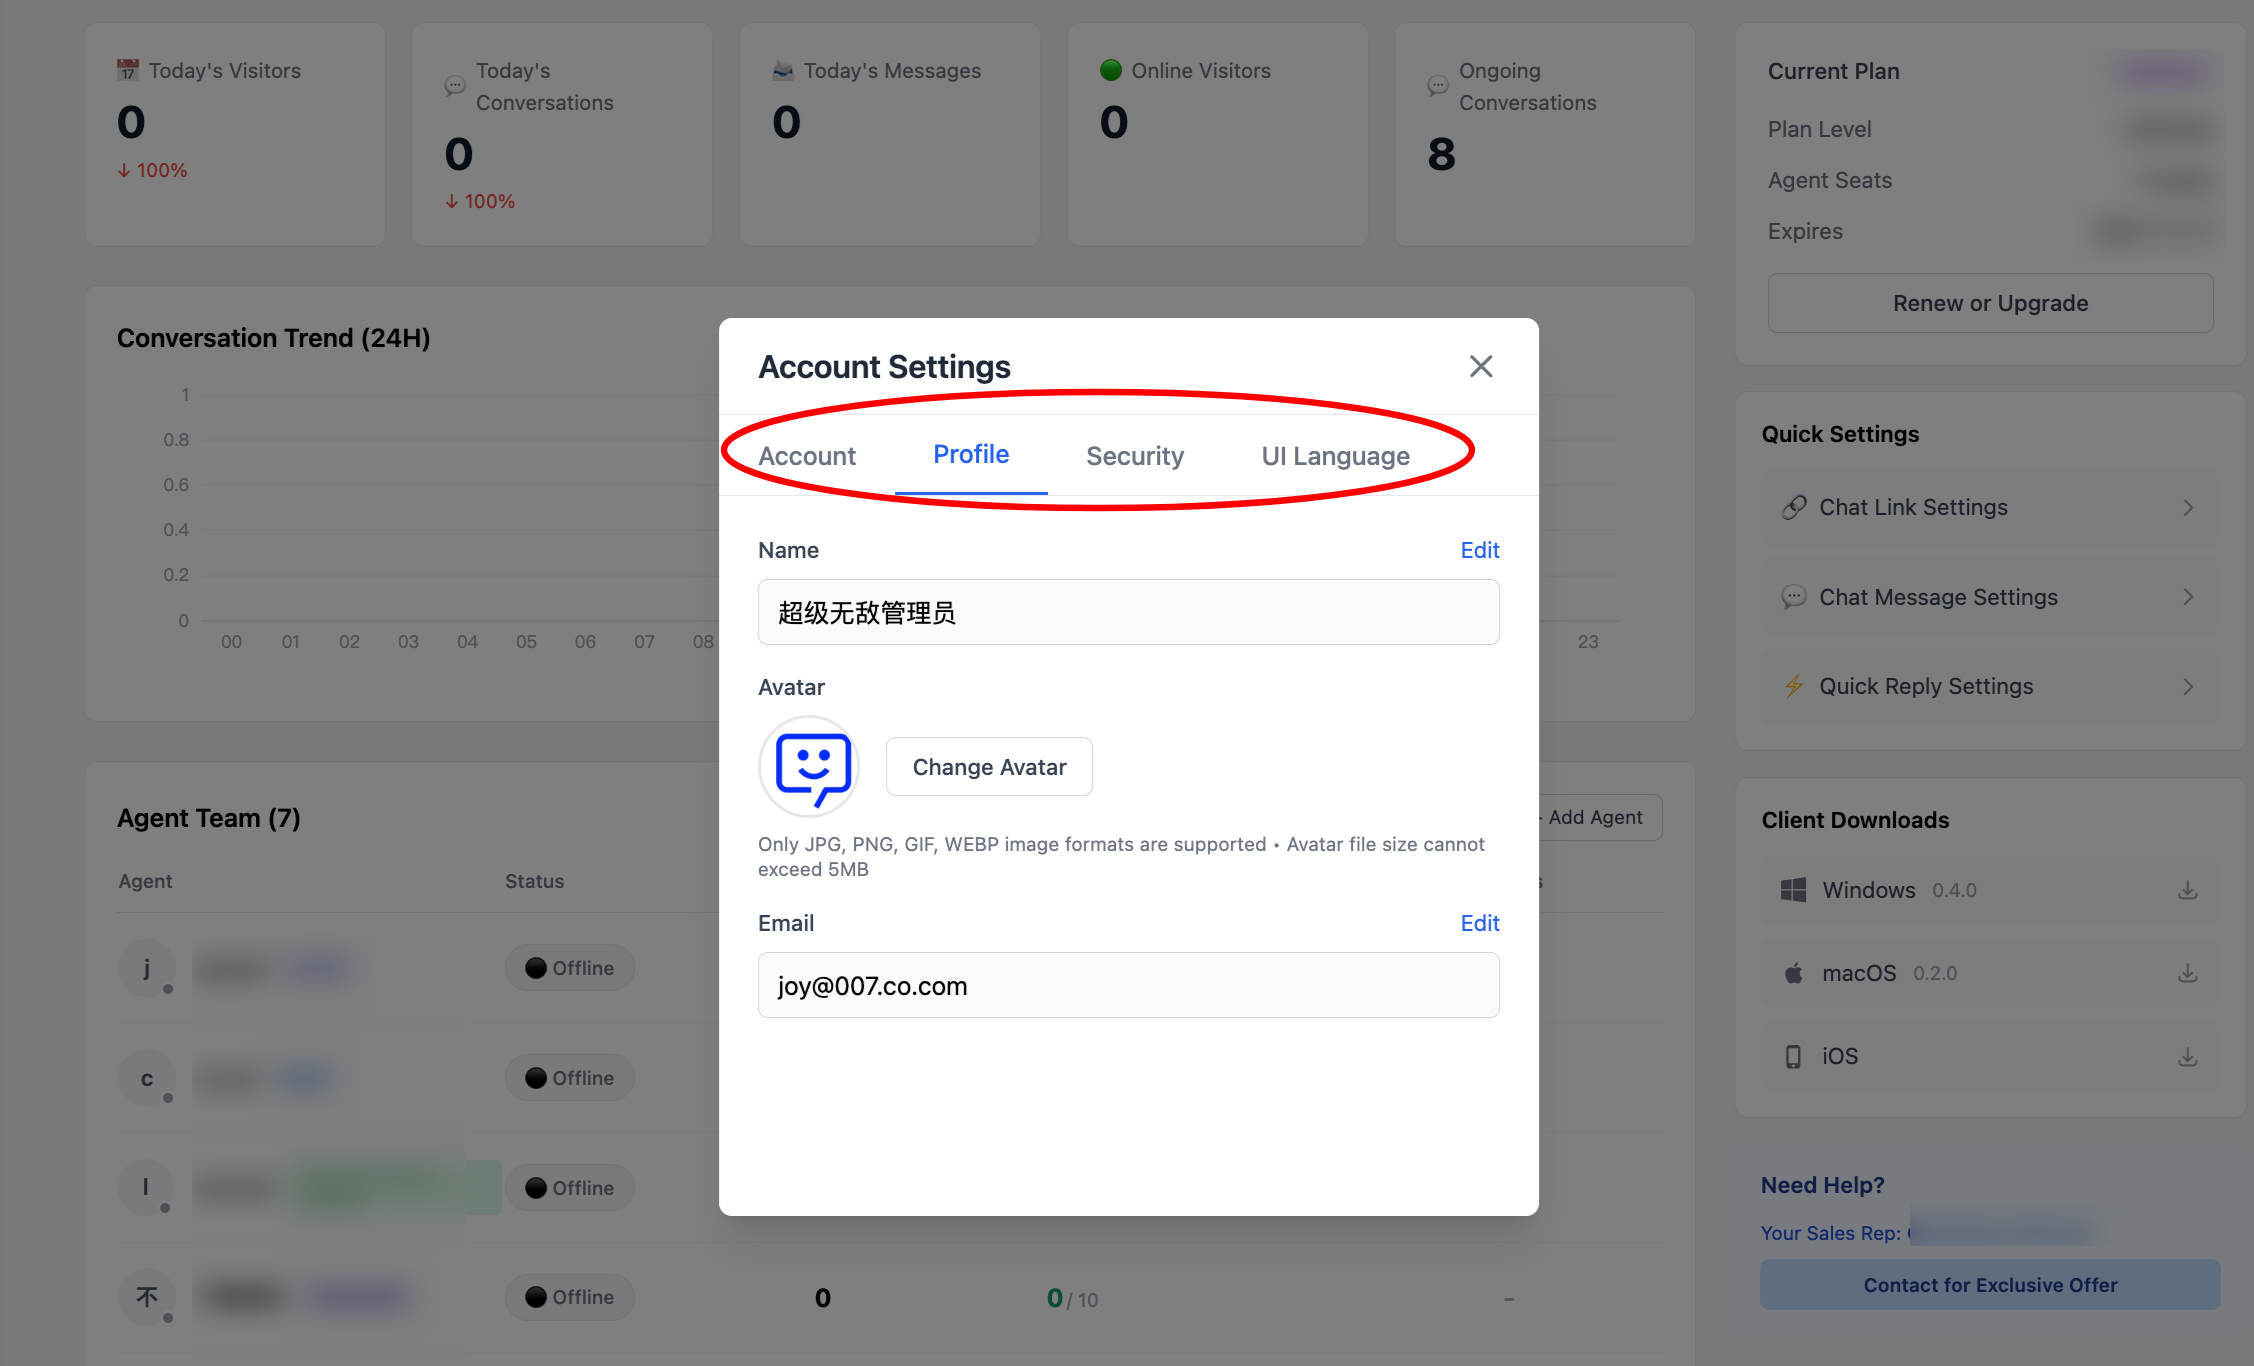
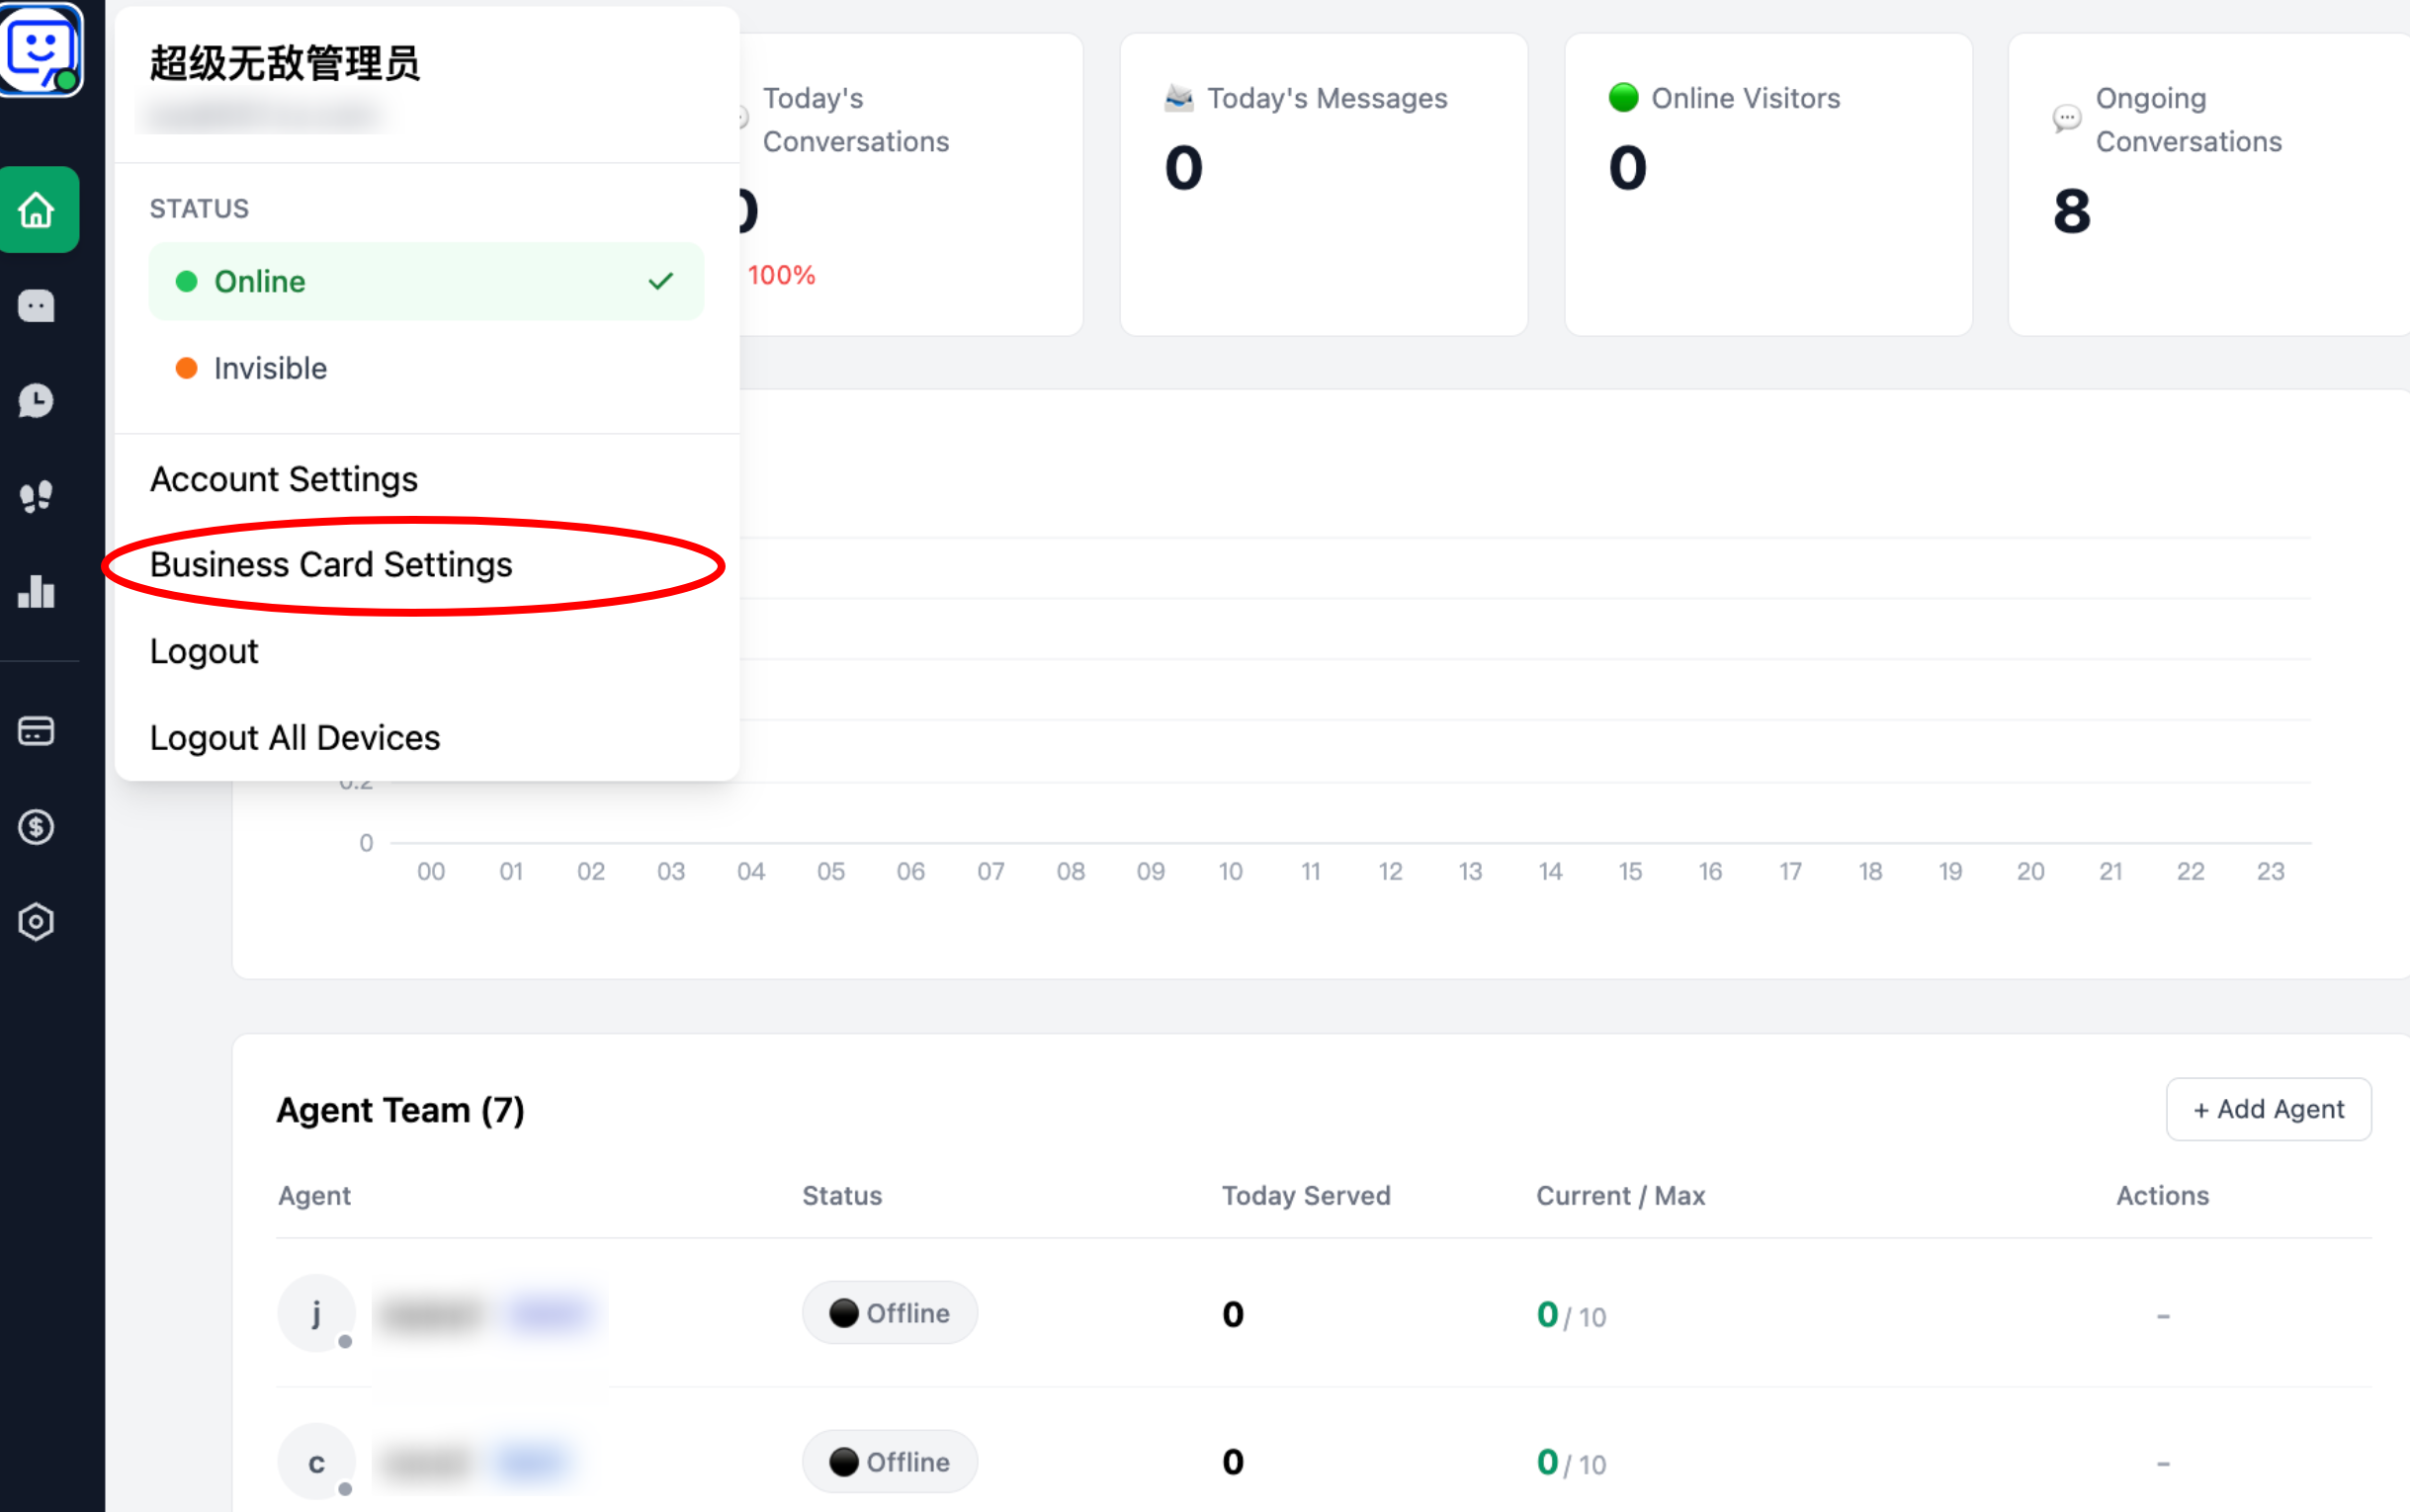
1.Click your avatar in the top-left corner to access account settings.
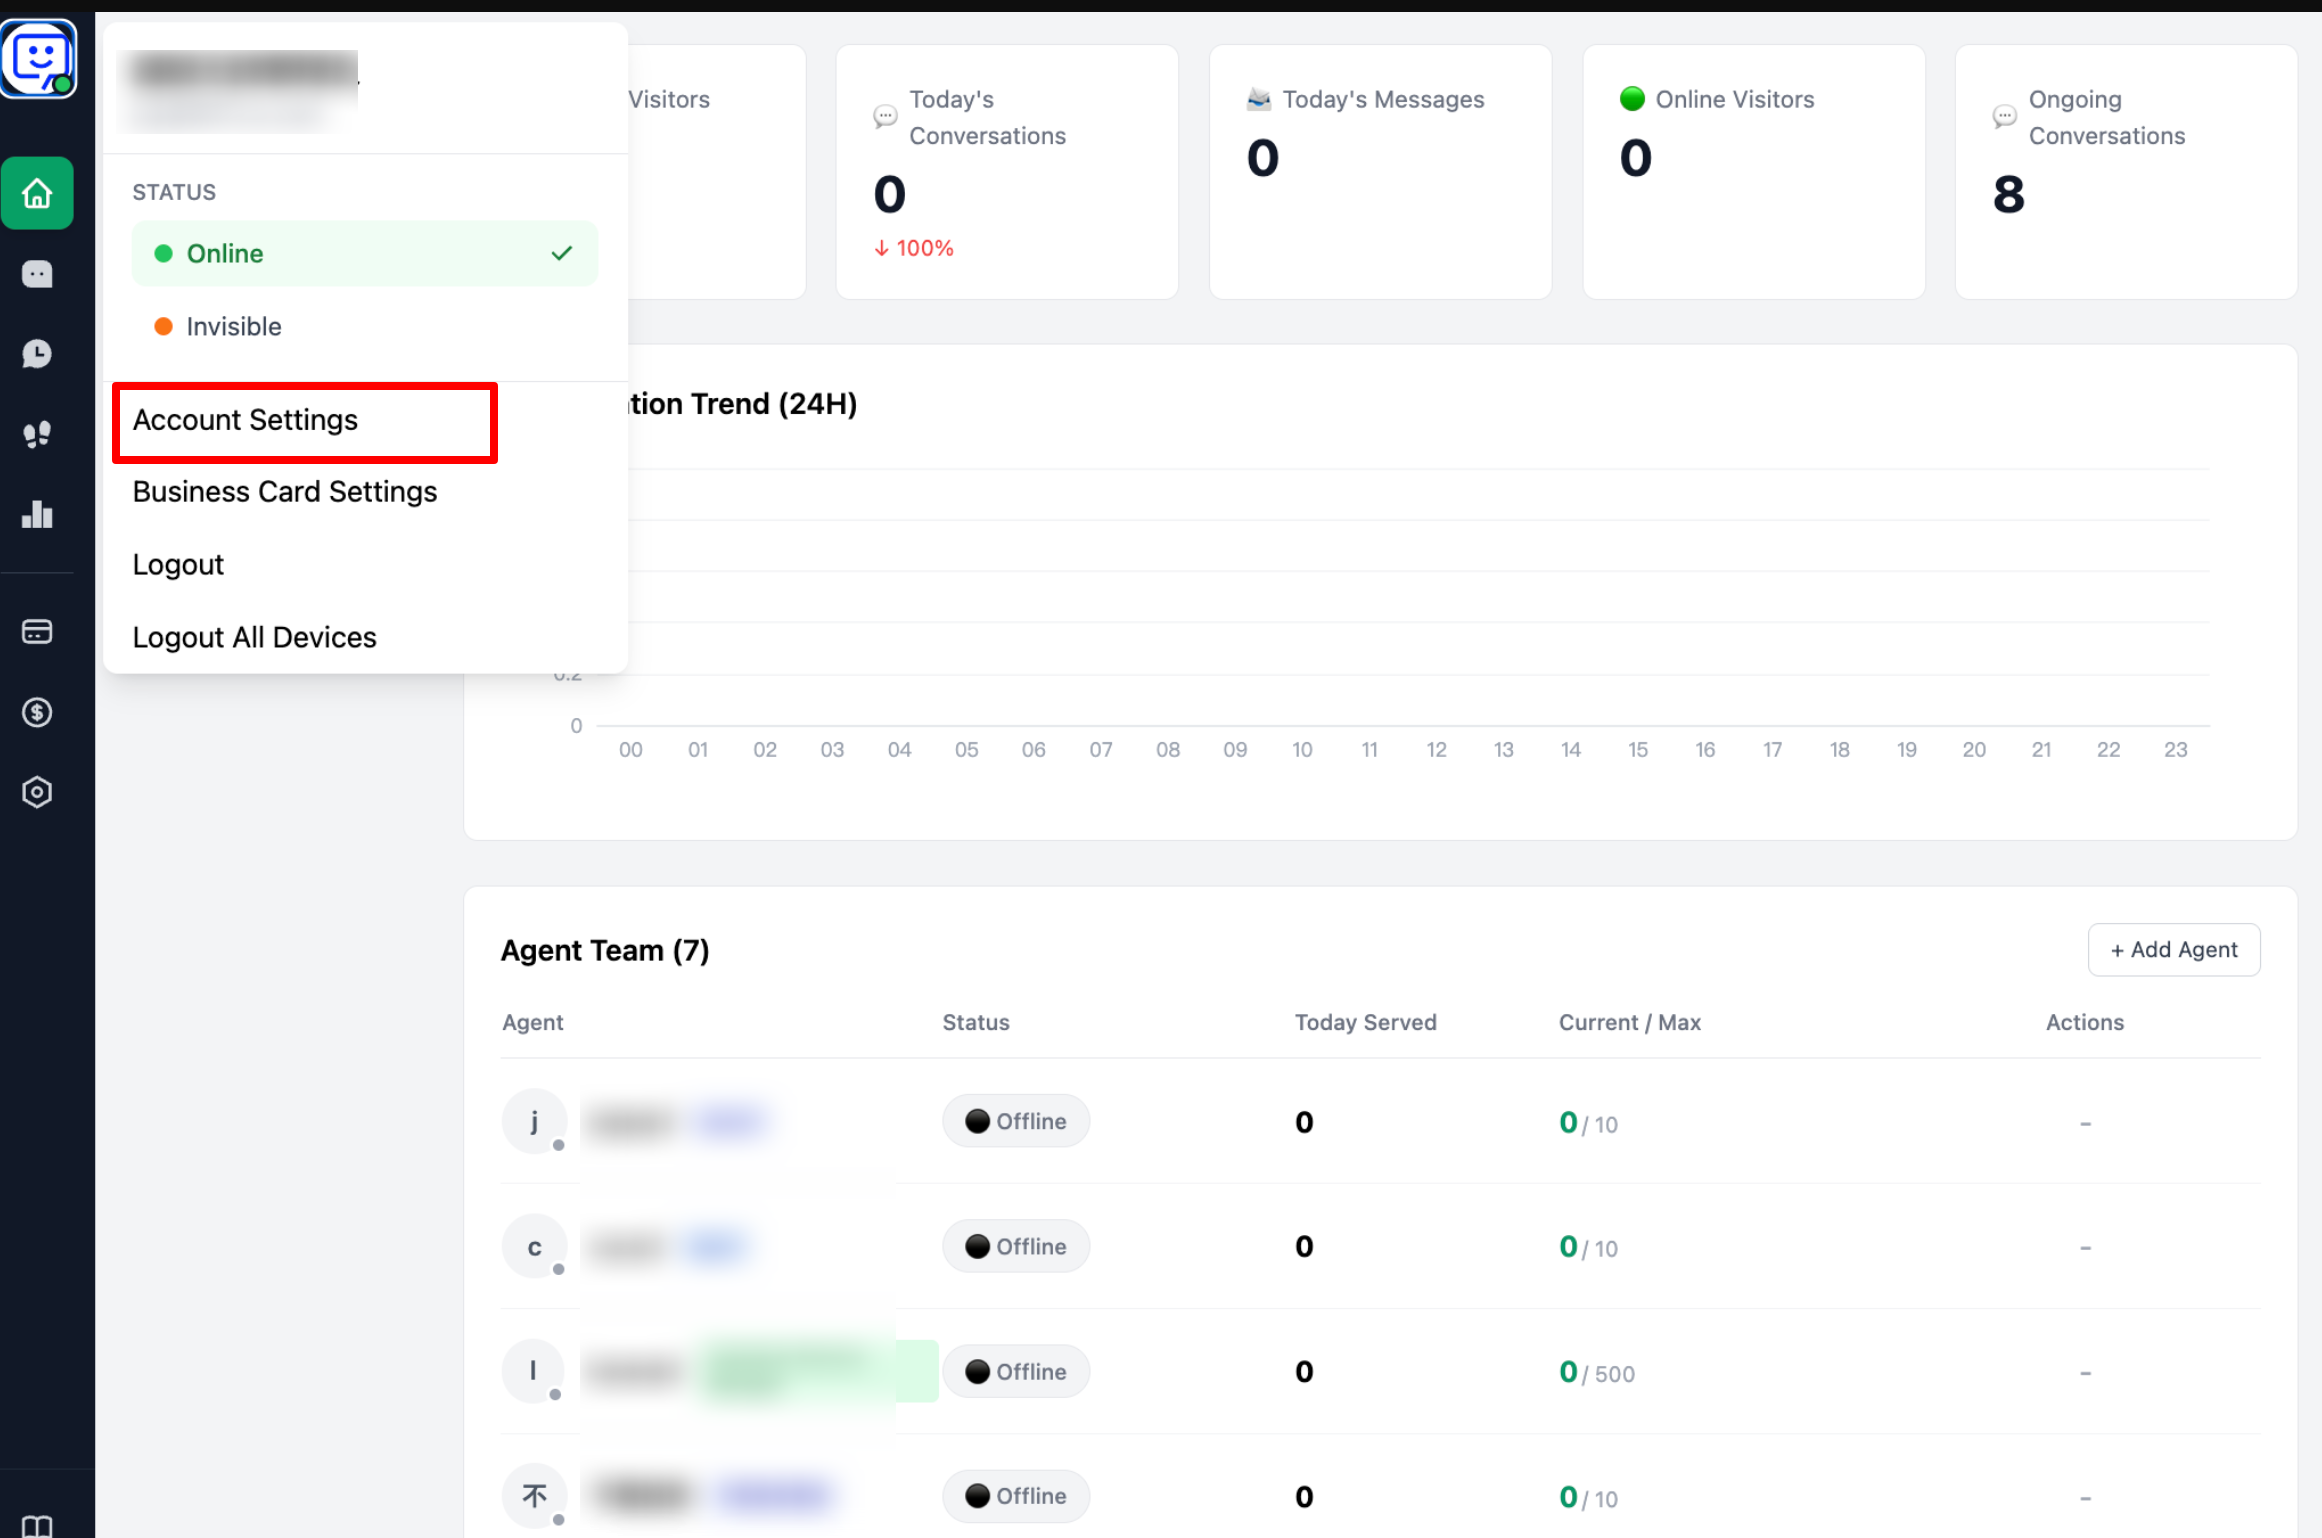
2.Here you can update your account details such as display name, avatar, and system language.
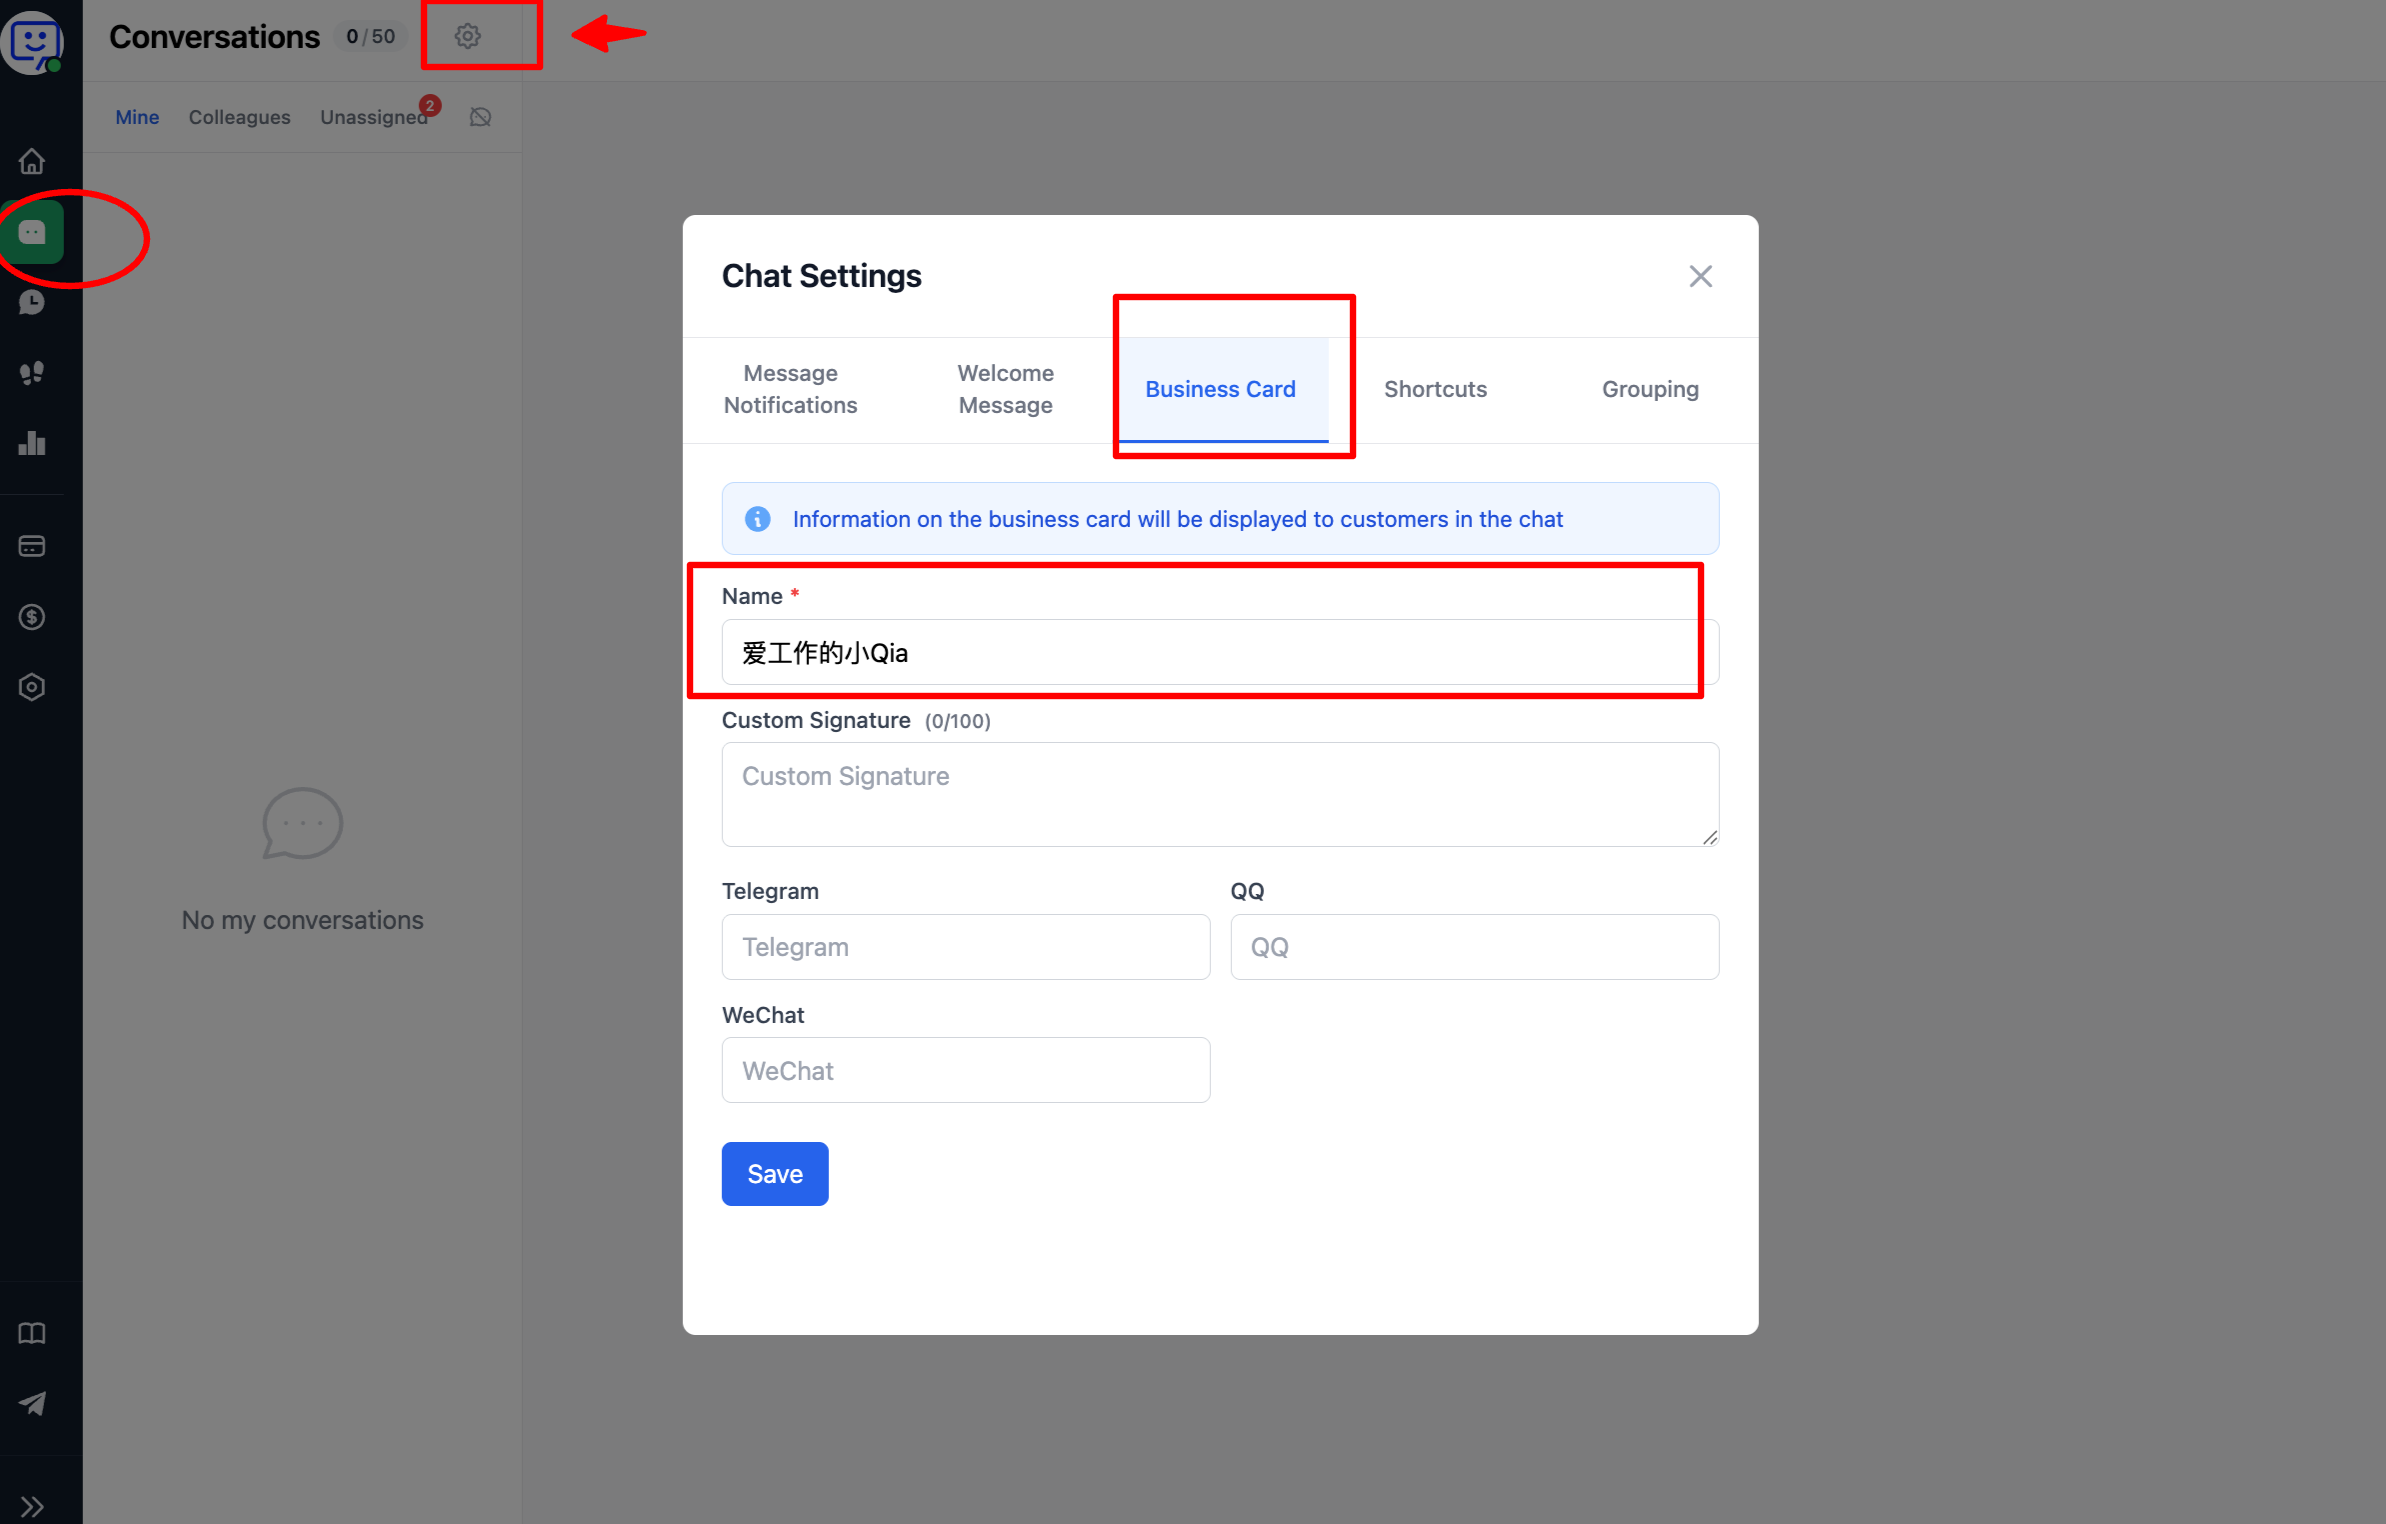
Note ⚠️: The name here is your internal system nickname. To change the name visitors see, click your avatar in the top-left and go to "Business card settings".
Or go to "Conversations" → "Chat Settings" → "Business Card" to edit.
Step 3: Create a Chat Link
There are several ways to create a link. Choose what works best for you:
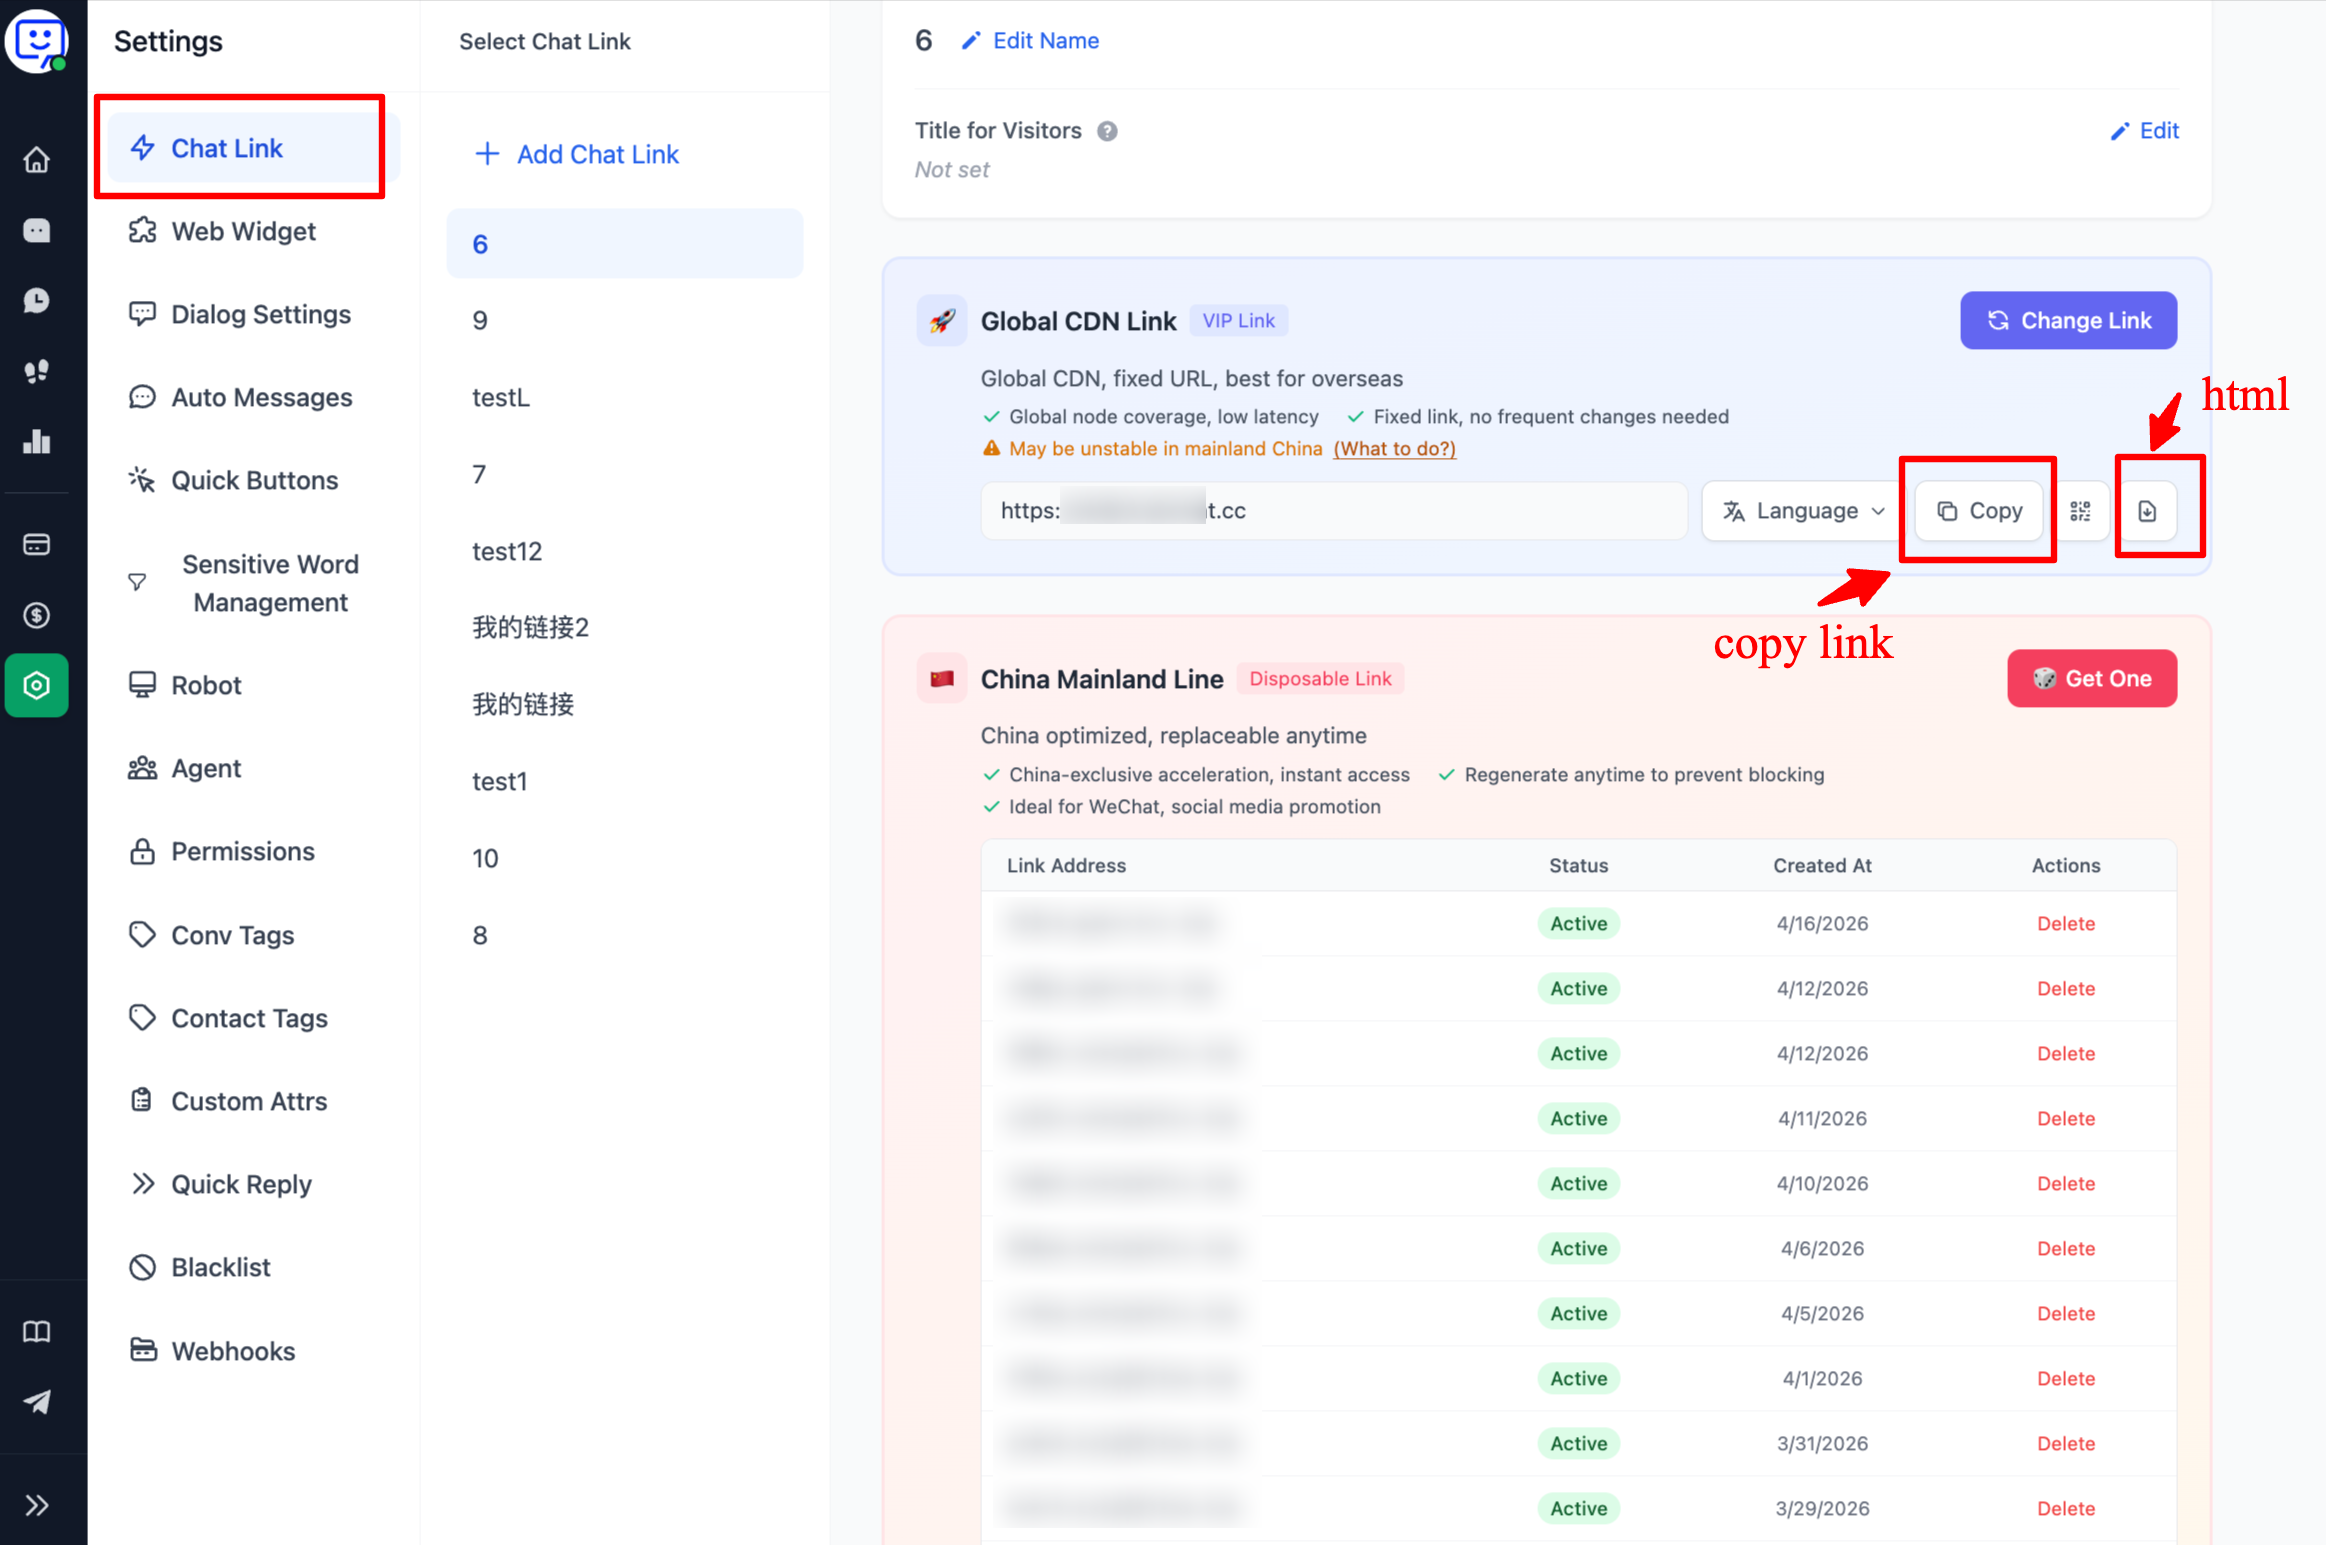
1.Go to "Settings" in the left sidebar, then find "Chat Links". Select "My Links" and copy the "VIP Link" to deploy on your website. You can also click the download button to get an HTML file for self-deployment.
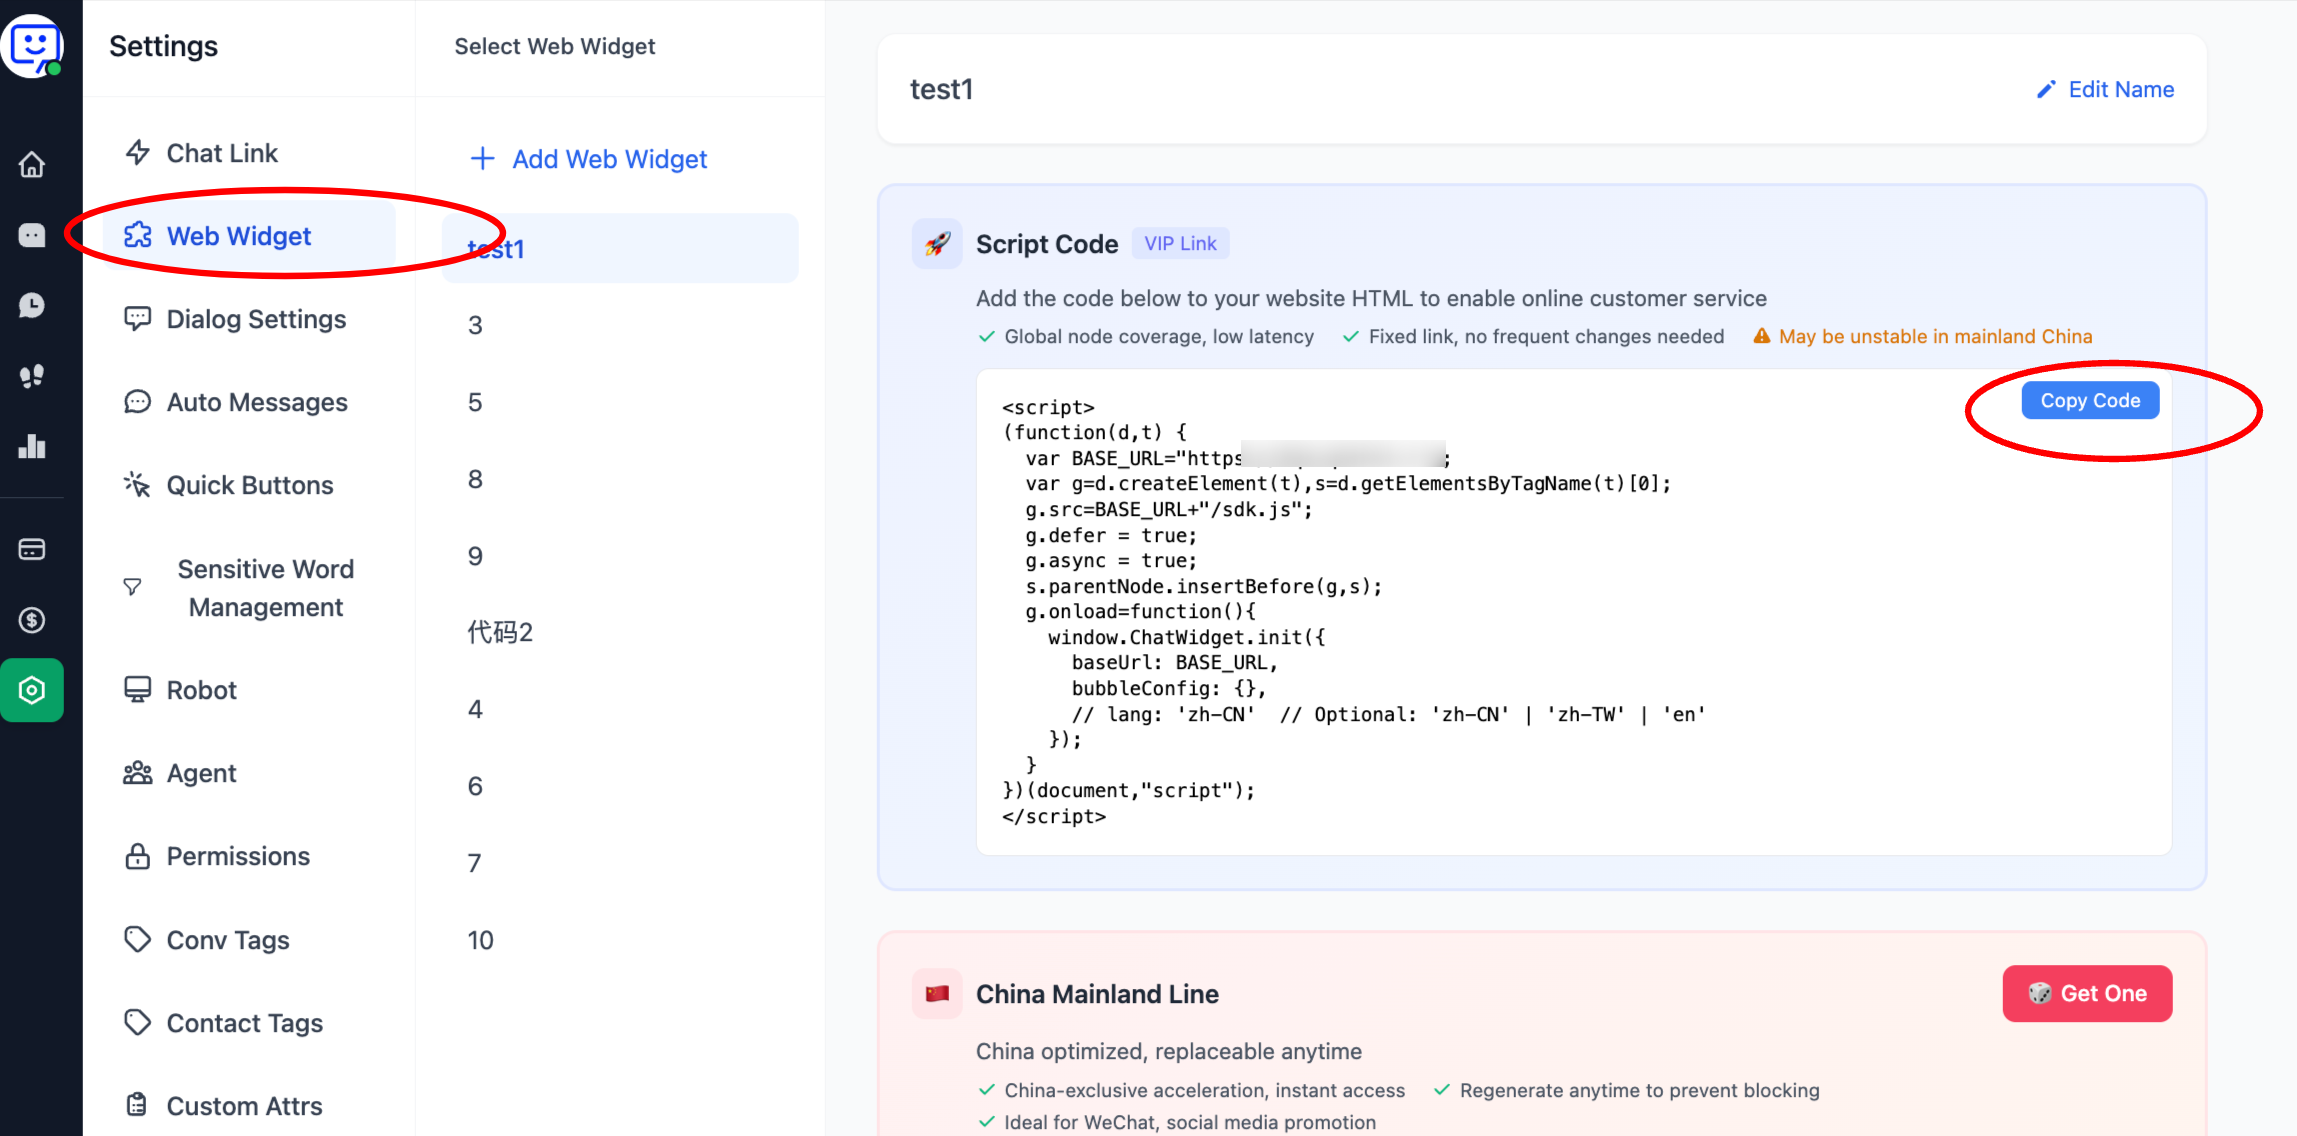
2.You can also add live chat via code. Go to "Settings" in the left sidebar, then click "Web Widget" to add the widget to your website.
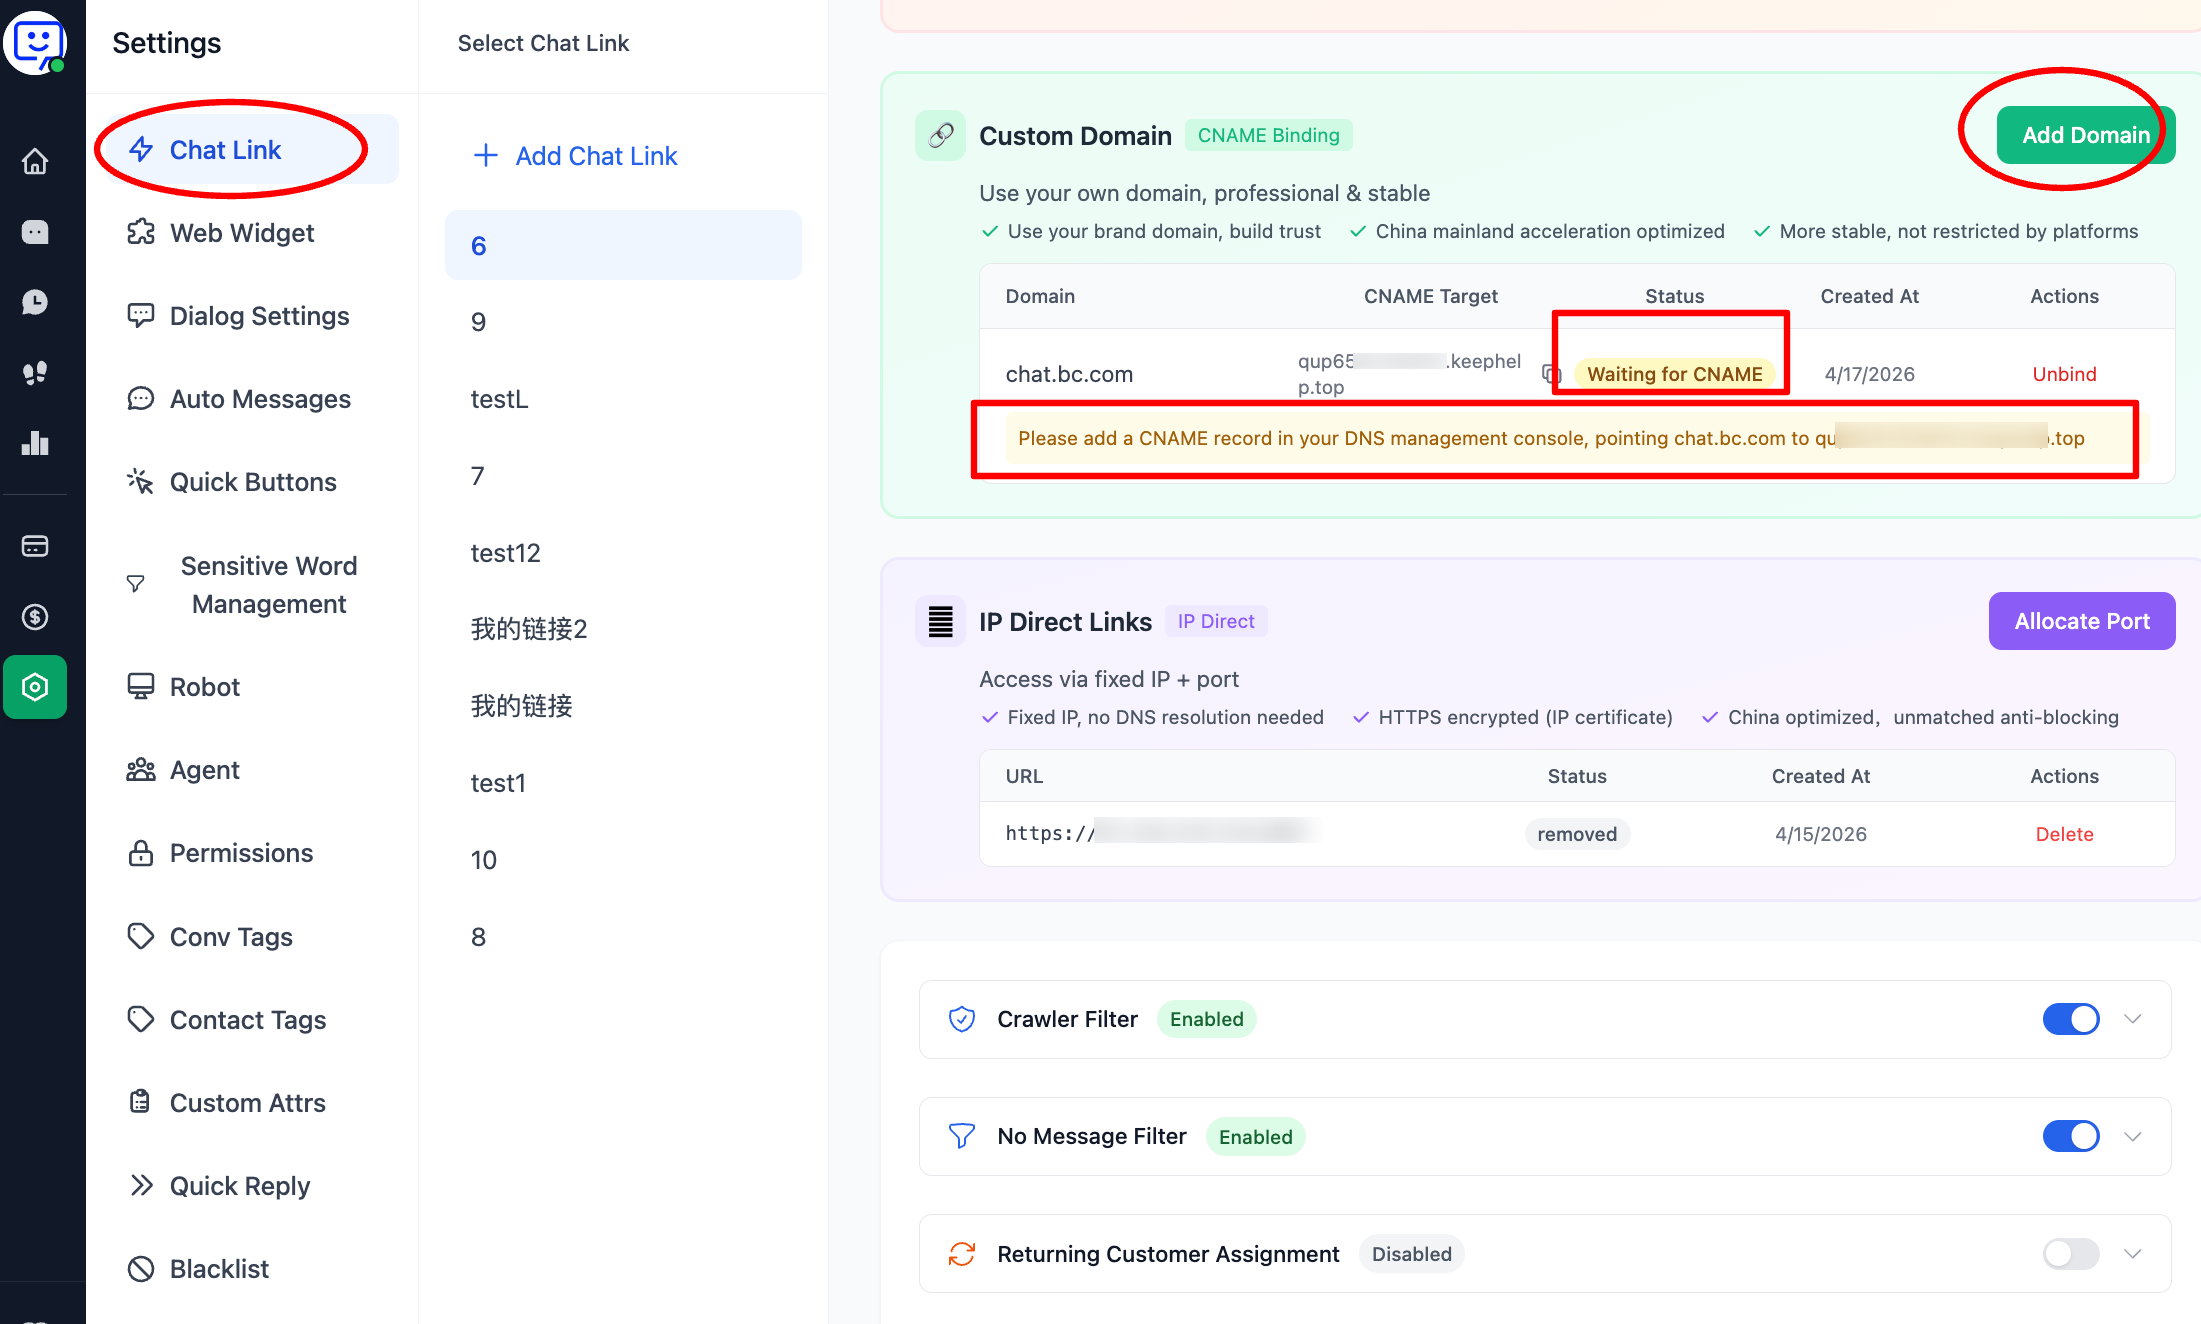
3.You can also bind your own domain using the custom domain feature. In Chat Settings, scroll down to "Custom Domain", click "Add Domain", and follow the prompts to add a CNAME record.
Step 4: Reply to Conversations
Once you've deployed the chat link, visitors can start conversations and agents can begin replying.
1.Agents can find new conversations in the "Conversations" section of the left sidebar. Click on a conversation to reply.
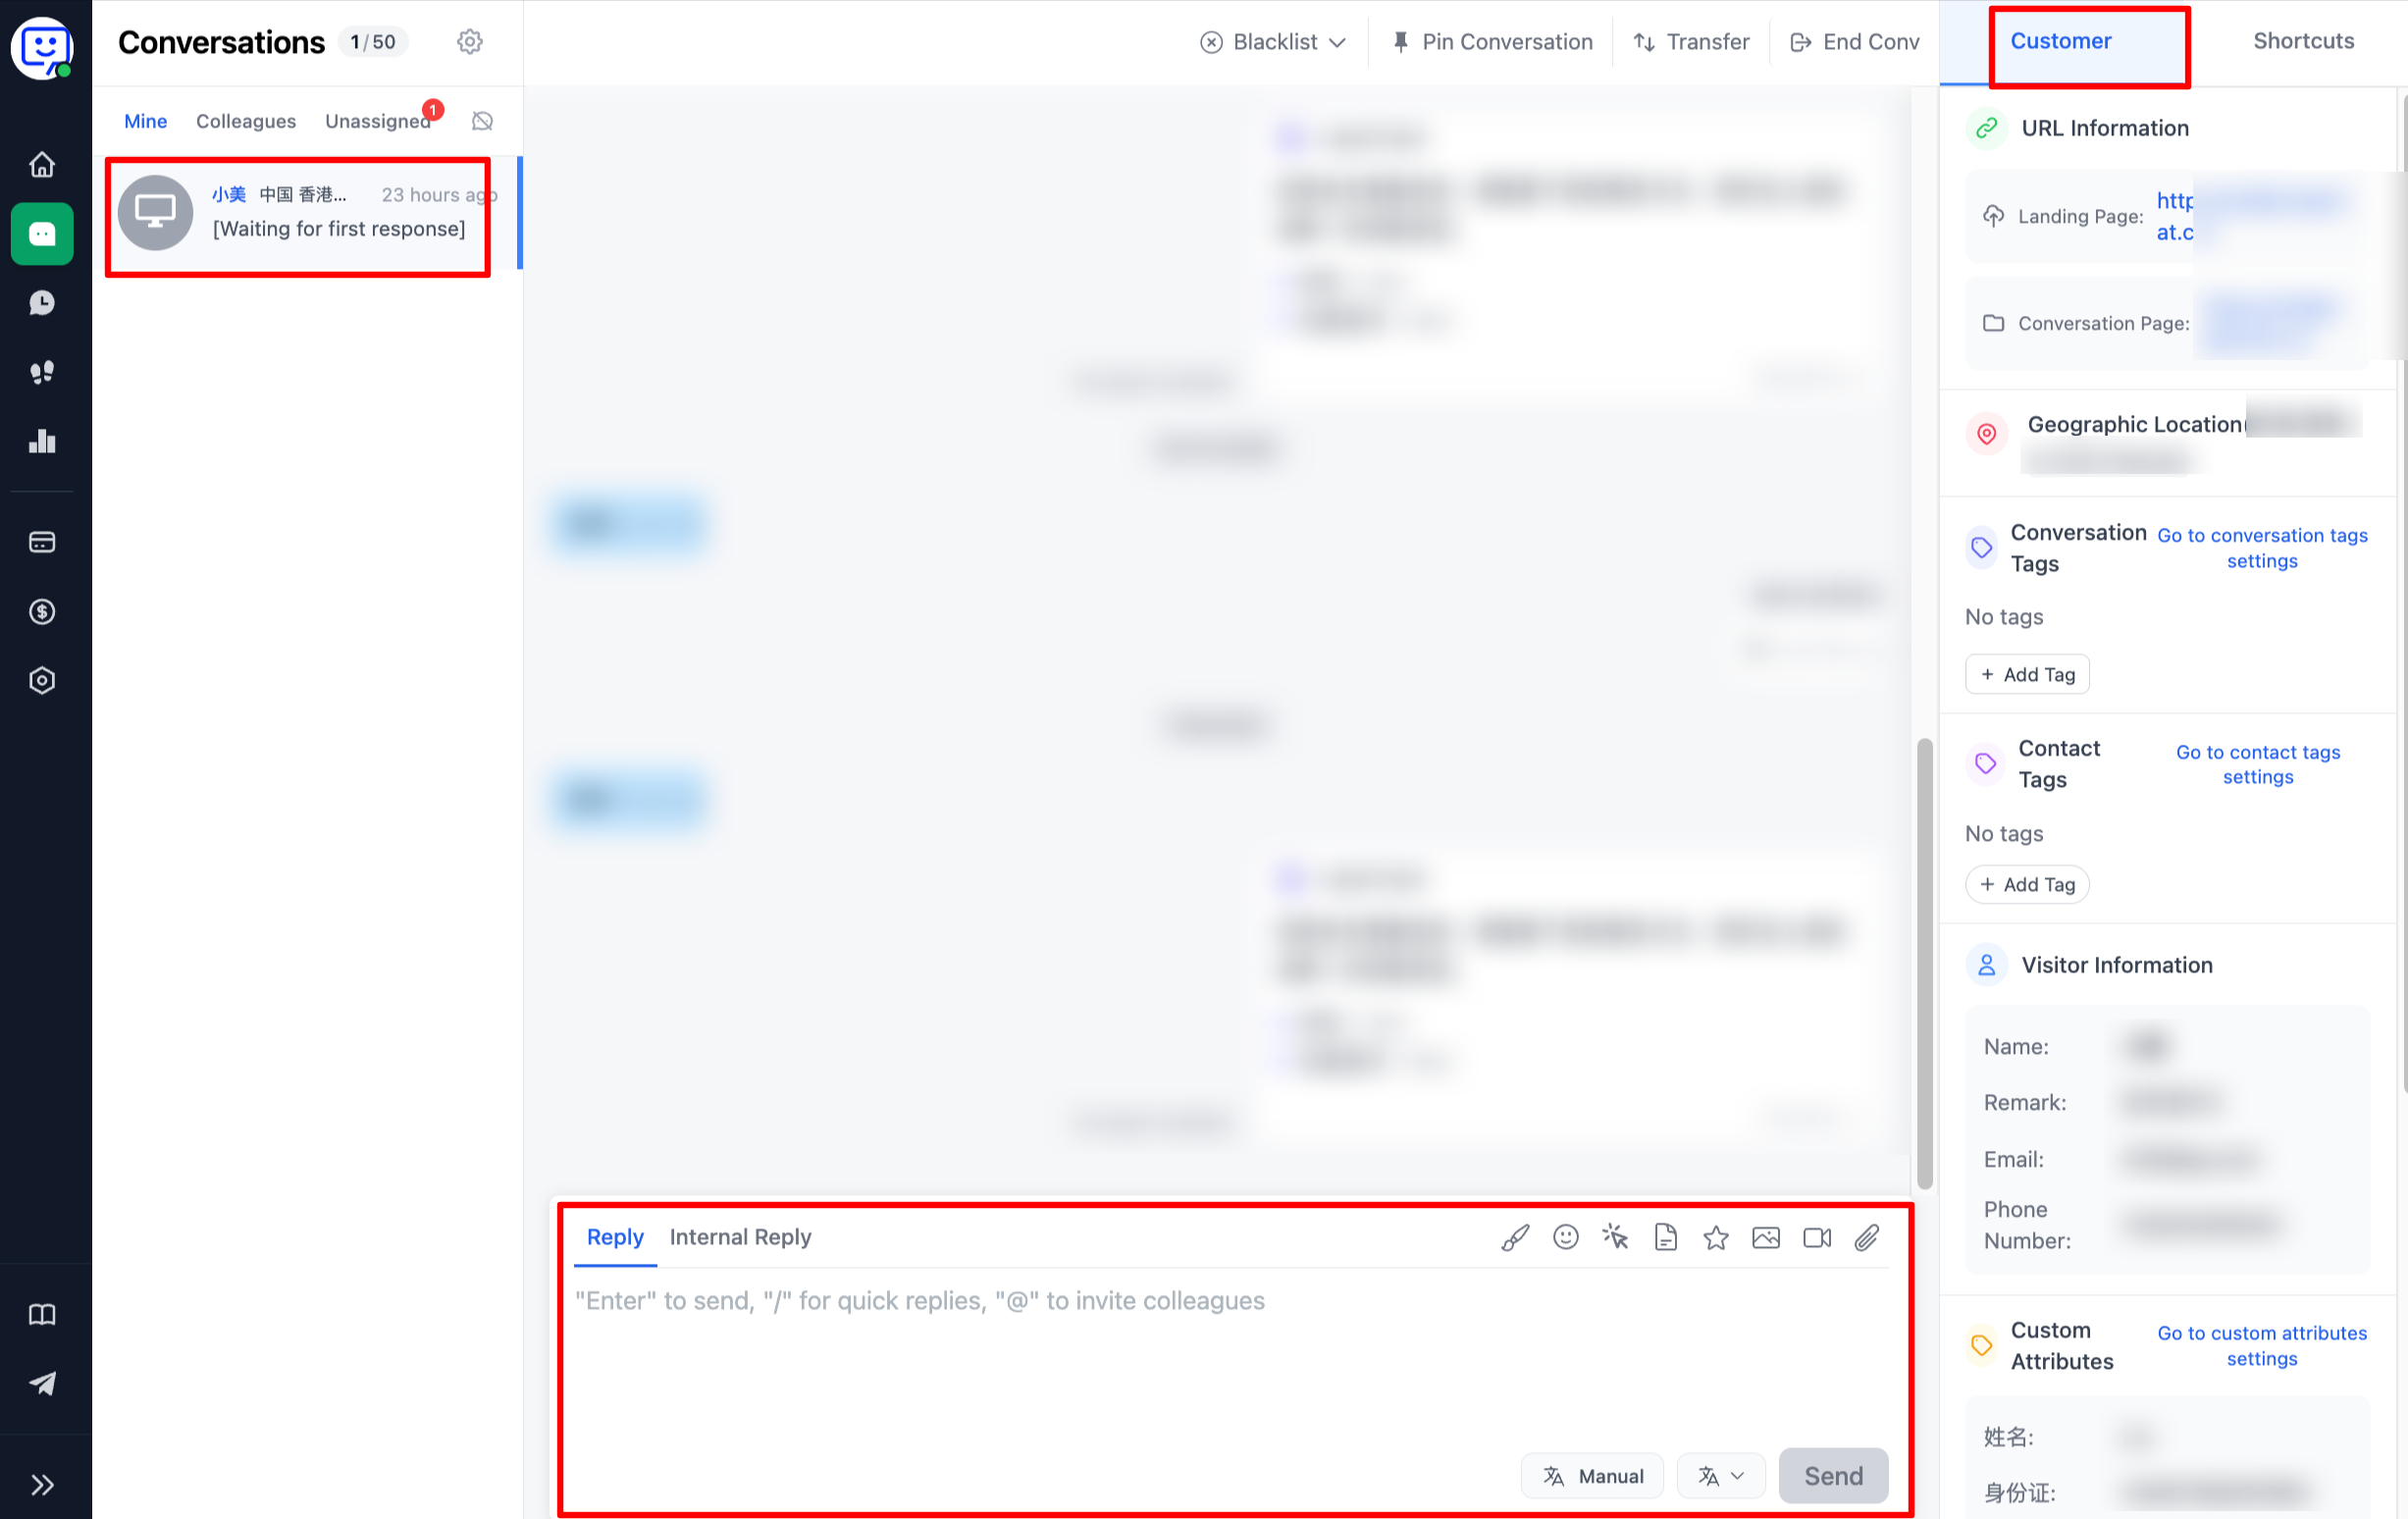
2.The conversation panel is feature-rich. Agents can use it according to their needs.
- The reply bar supports sending: emojis, quick buttons, lead cards, images, videos, and attachments. The maximum file size is 50 MB. You can also switch to "Internal Reply" — messages sent from this mode are only visible to teammates. You can also @mention colleagues to join the conversation.

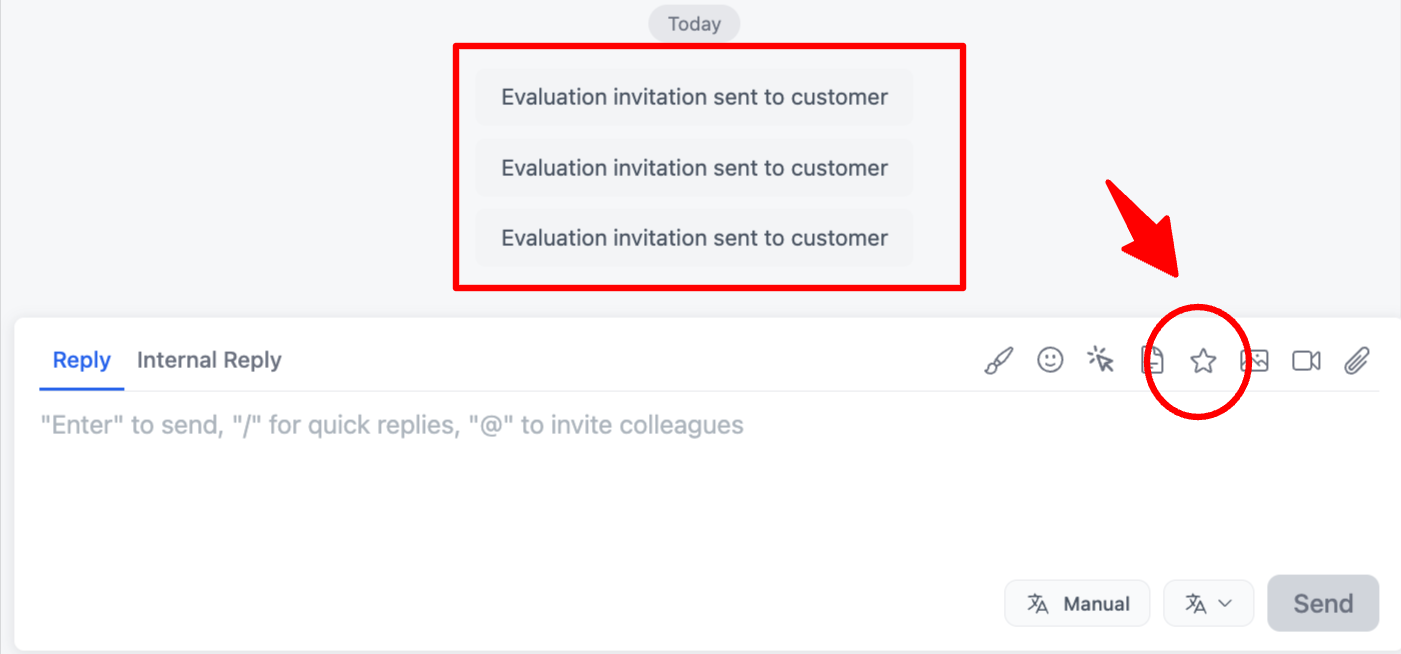
🎉 New feature: Agents can now send rating invitations during an active conversation by clicking the star icon. No need to wait until the conversation ends — sending during the chat improves visitor participation rates.
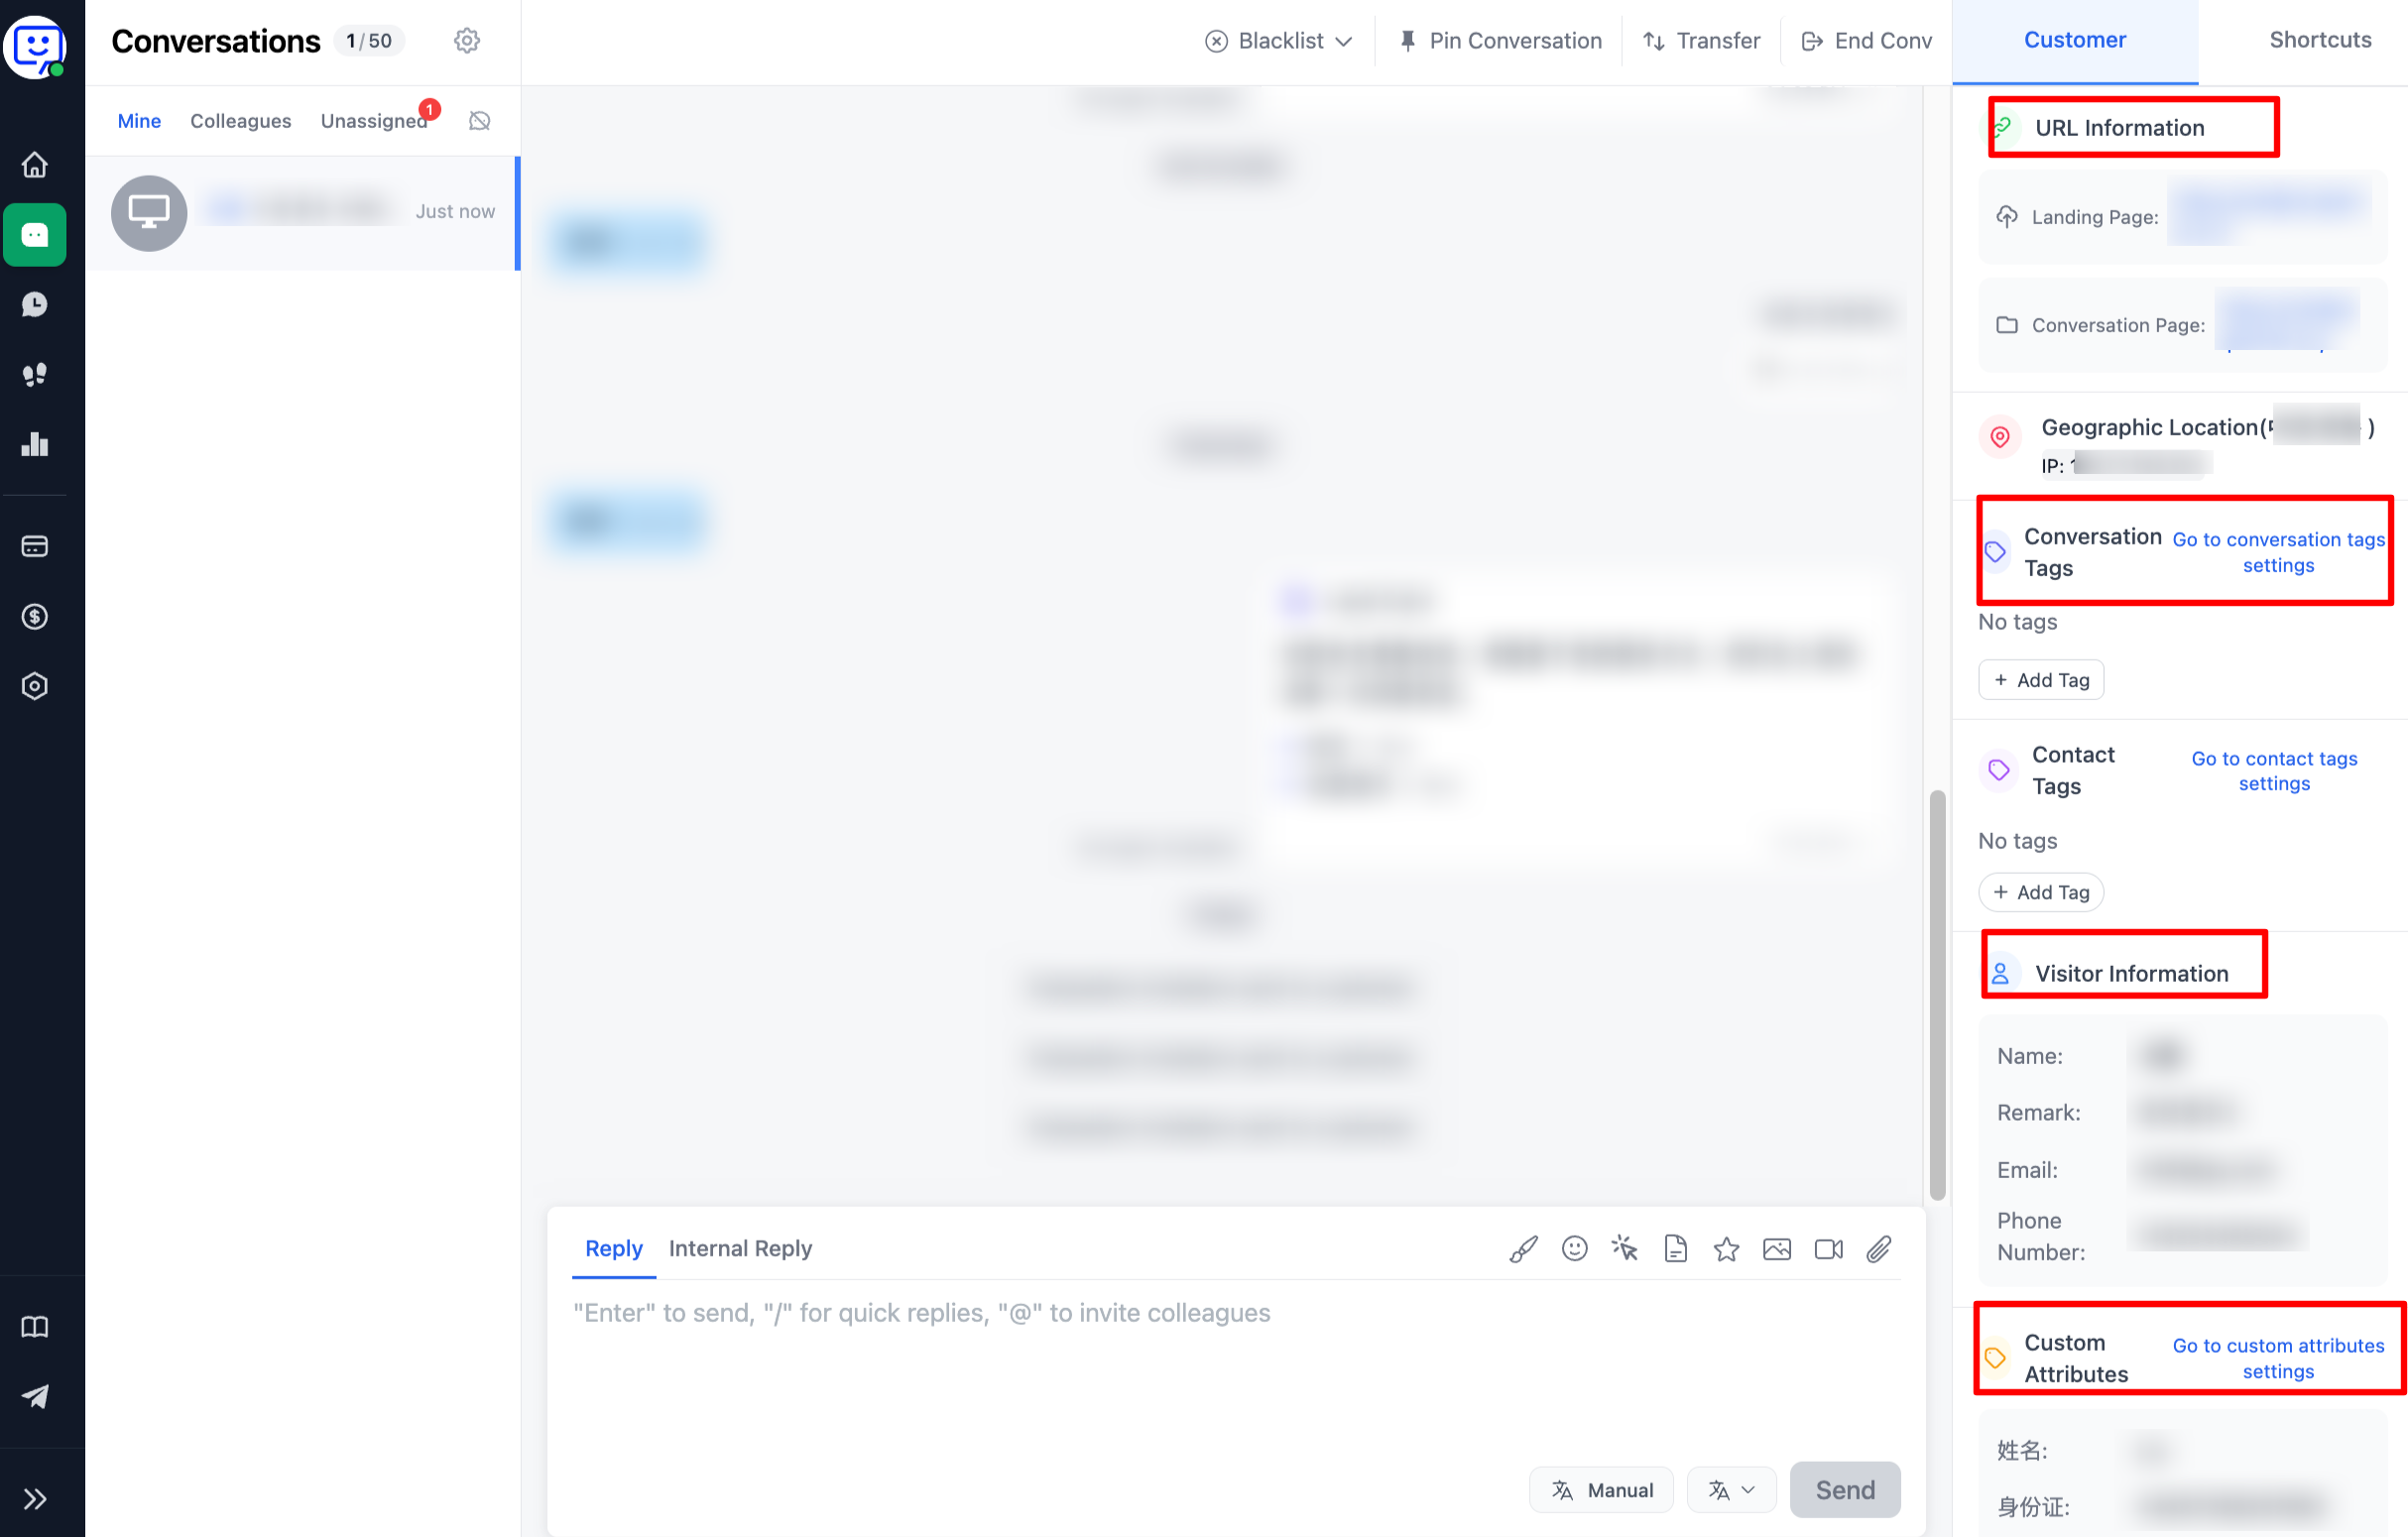
- The left panel on the right side shows customer information. You can view detailed visitor info and add your own notes.
- The right panel shows quick replies. Search and click a quick reply to insert it into the reply box, then send with one click.
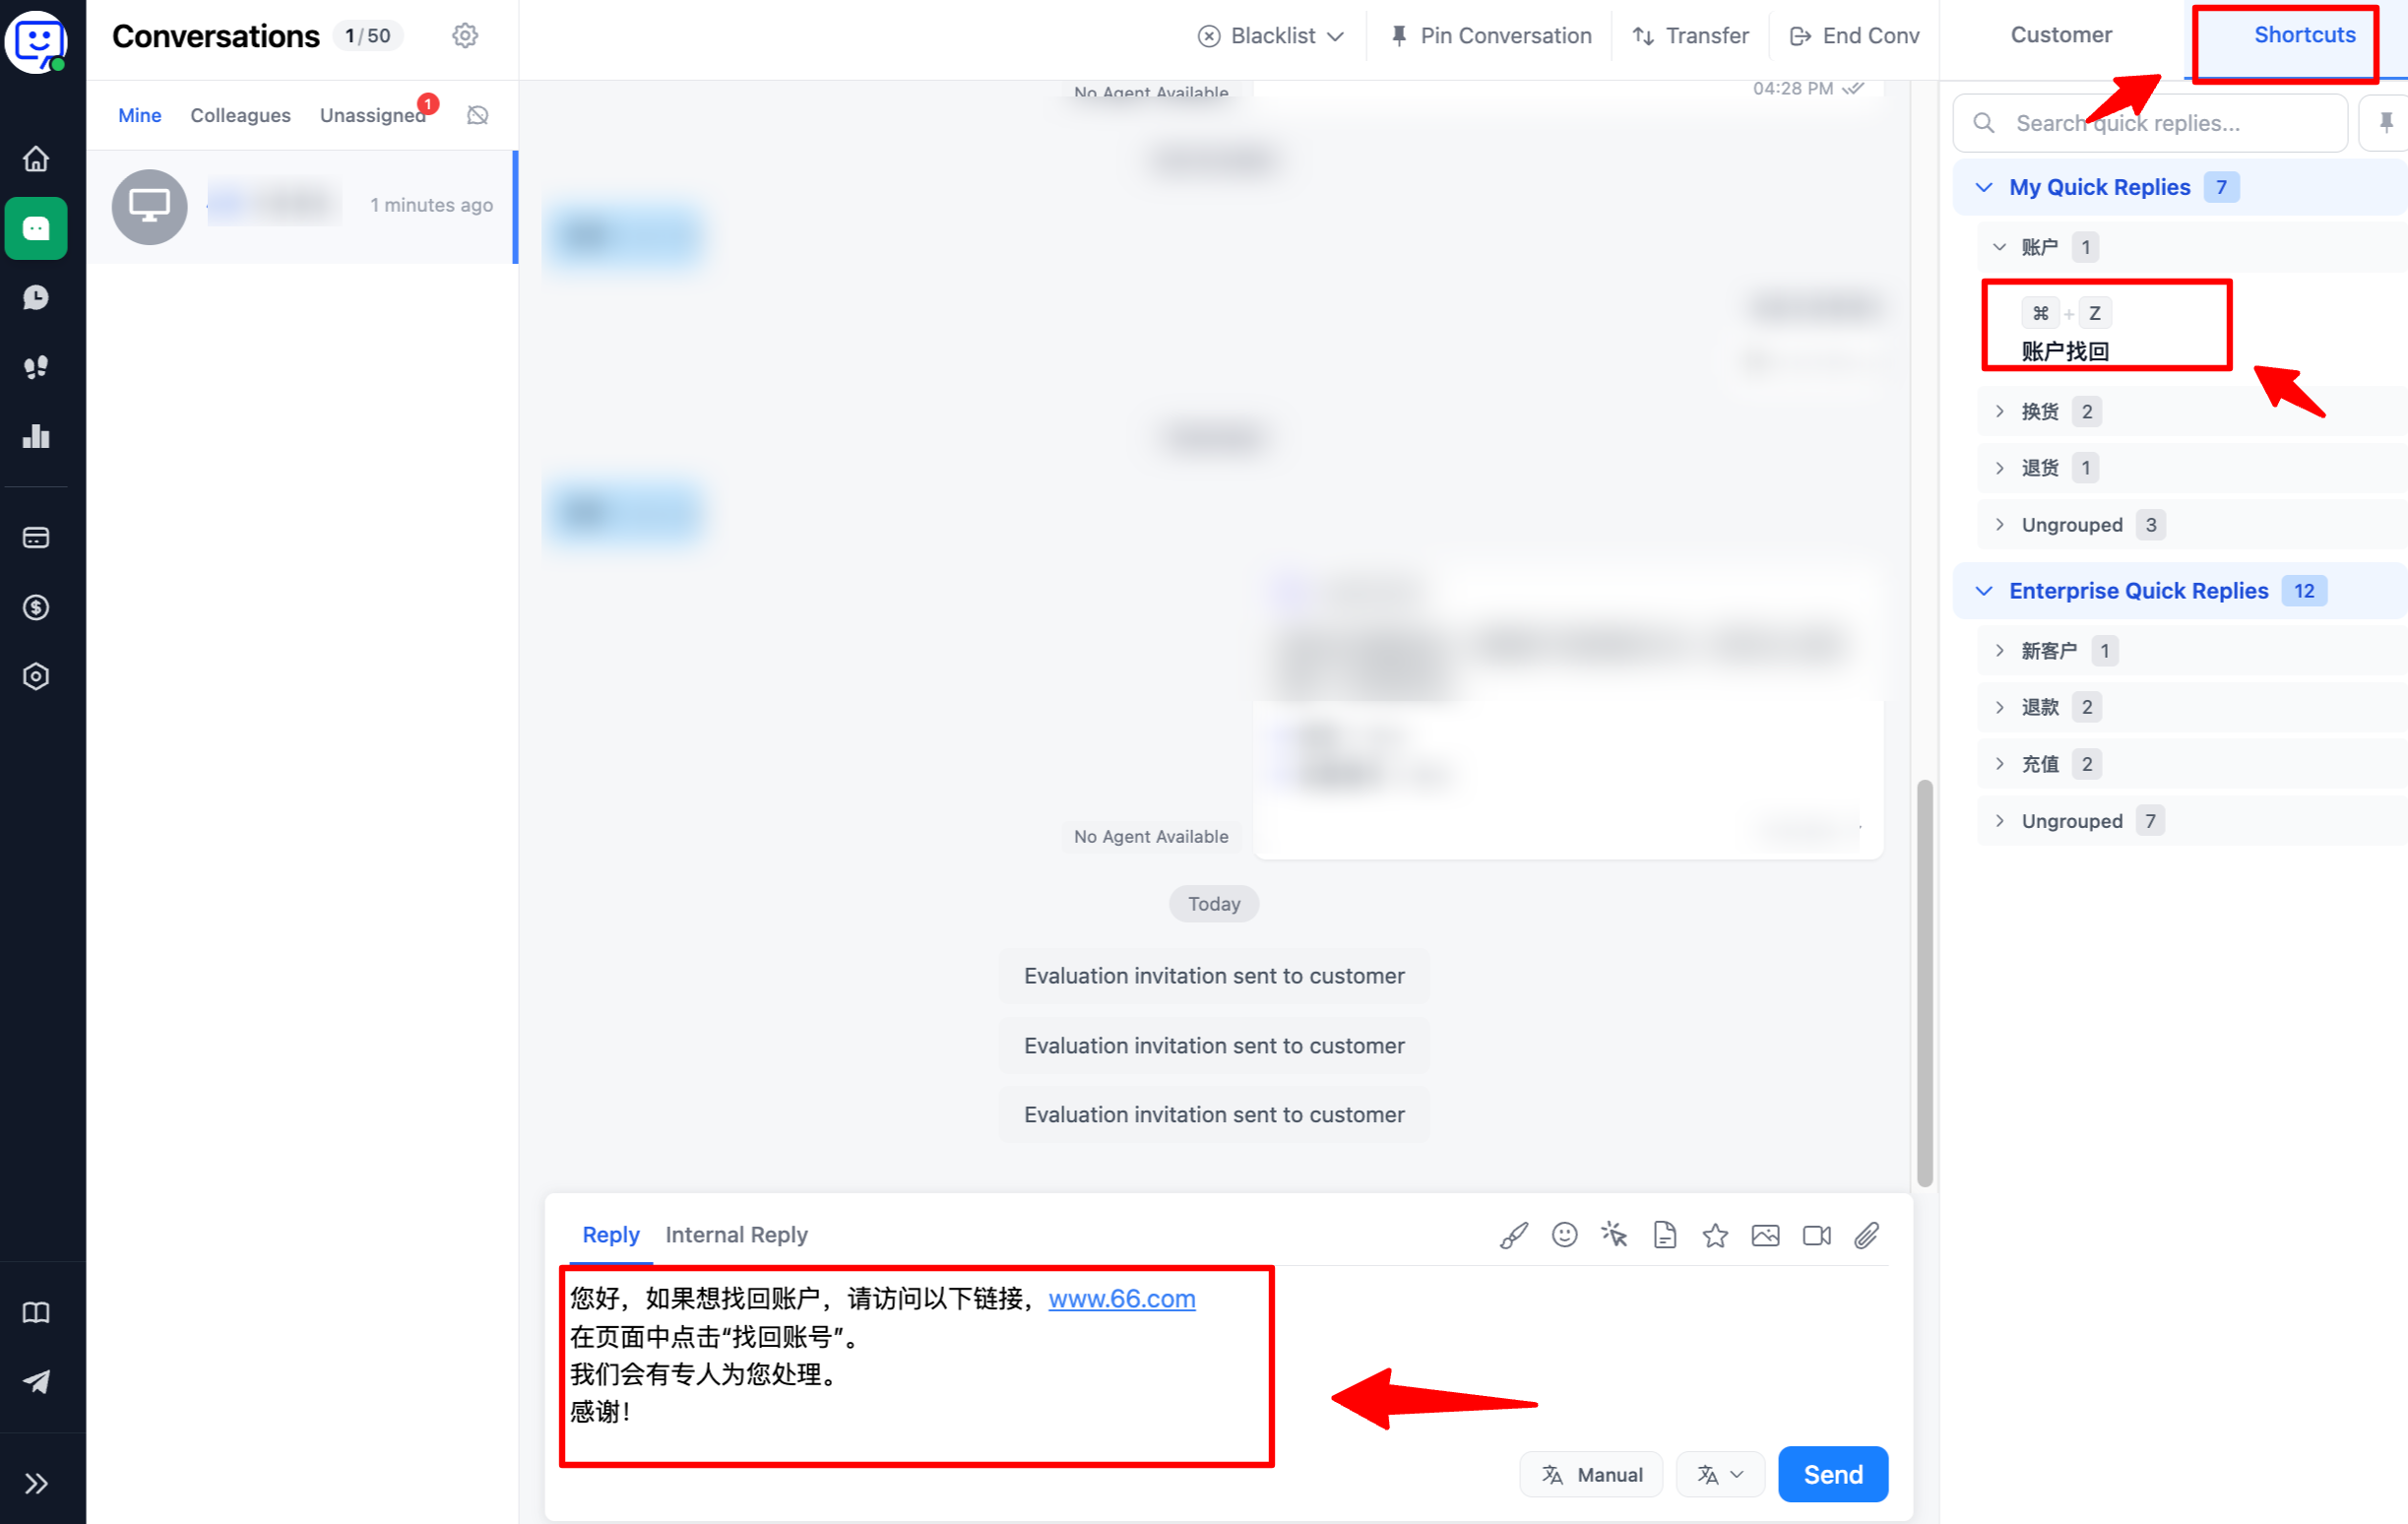
🎉 New feature: Quick replies on the right side can now be pinned! This significantly improves the efficiency of finding frequently used replies.
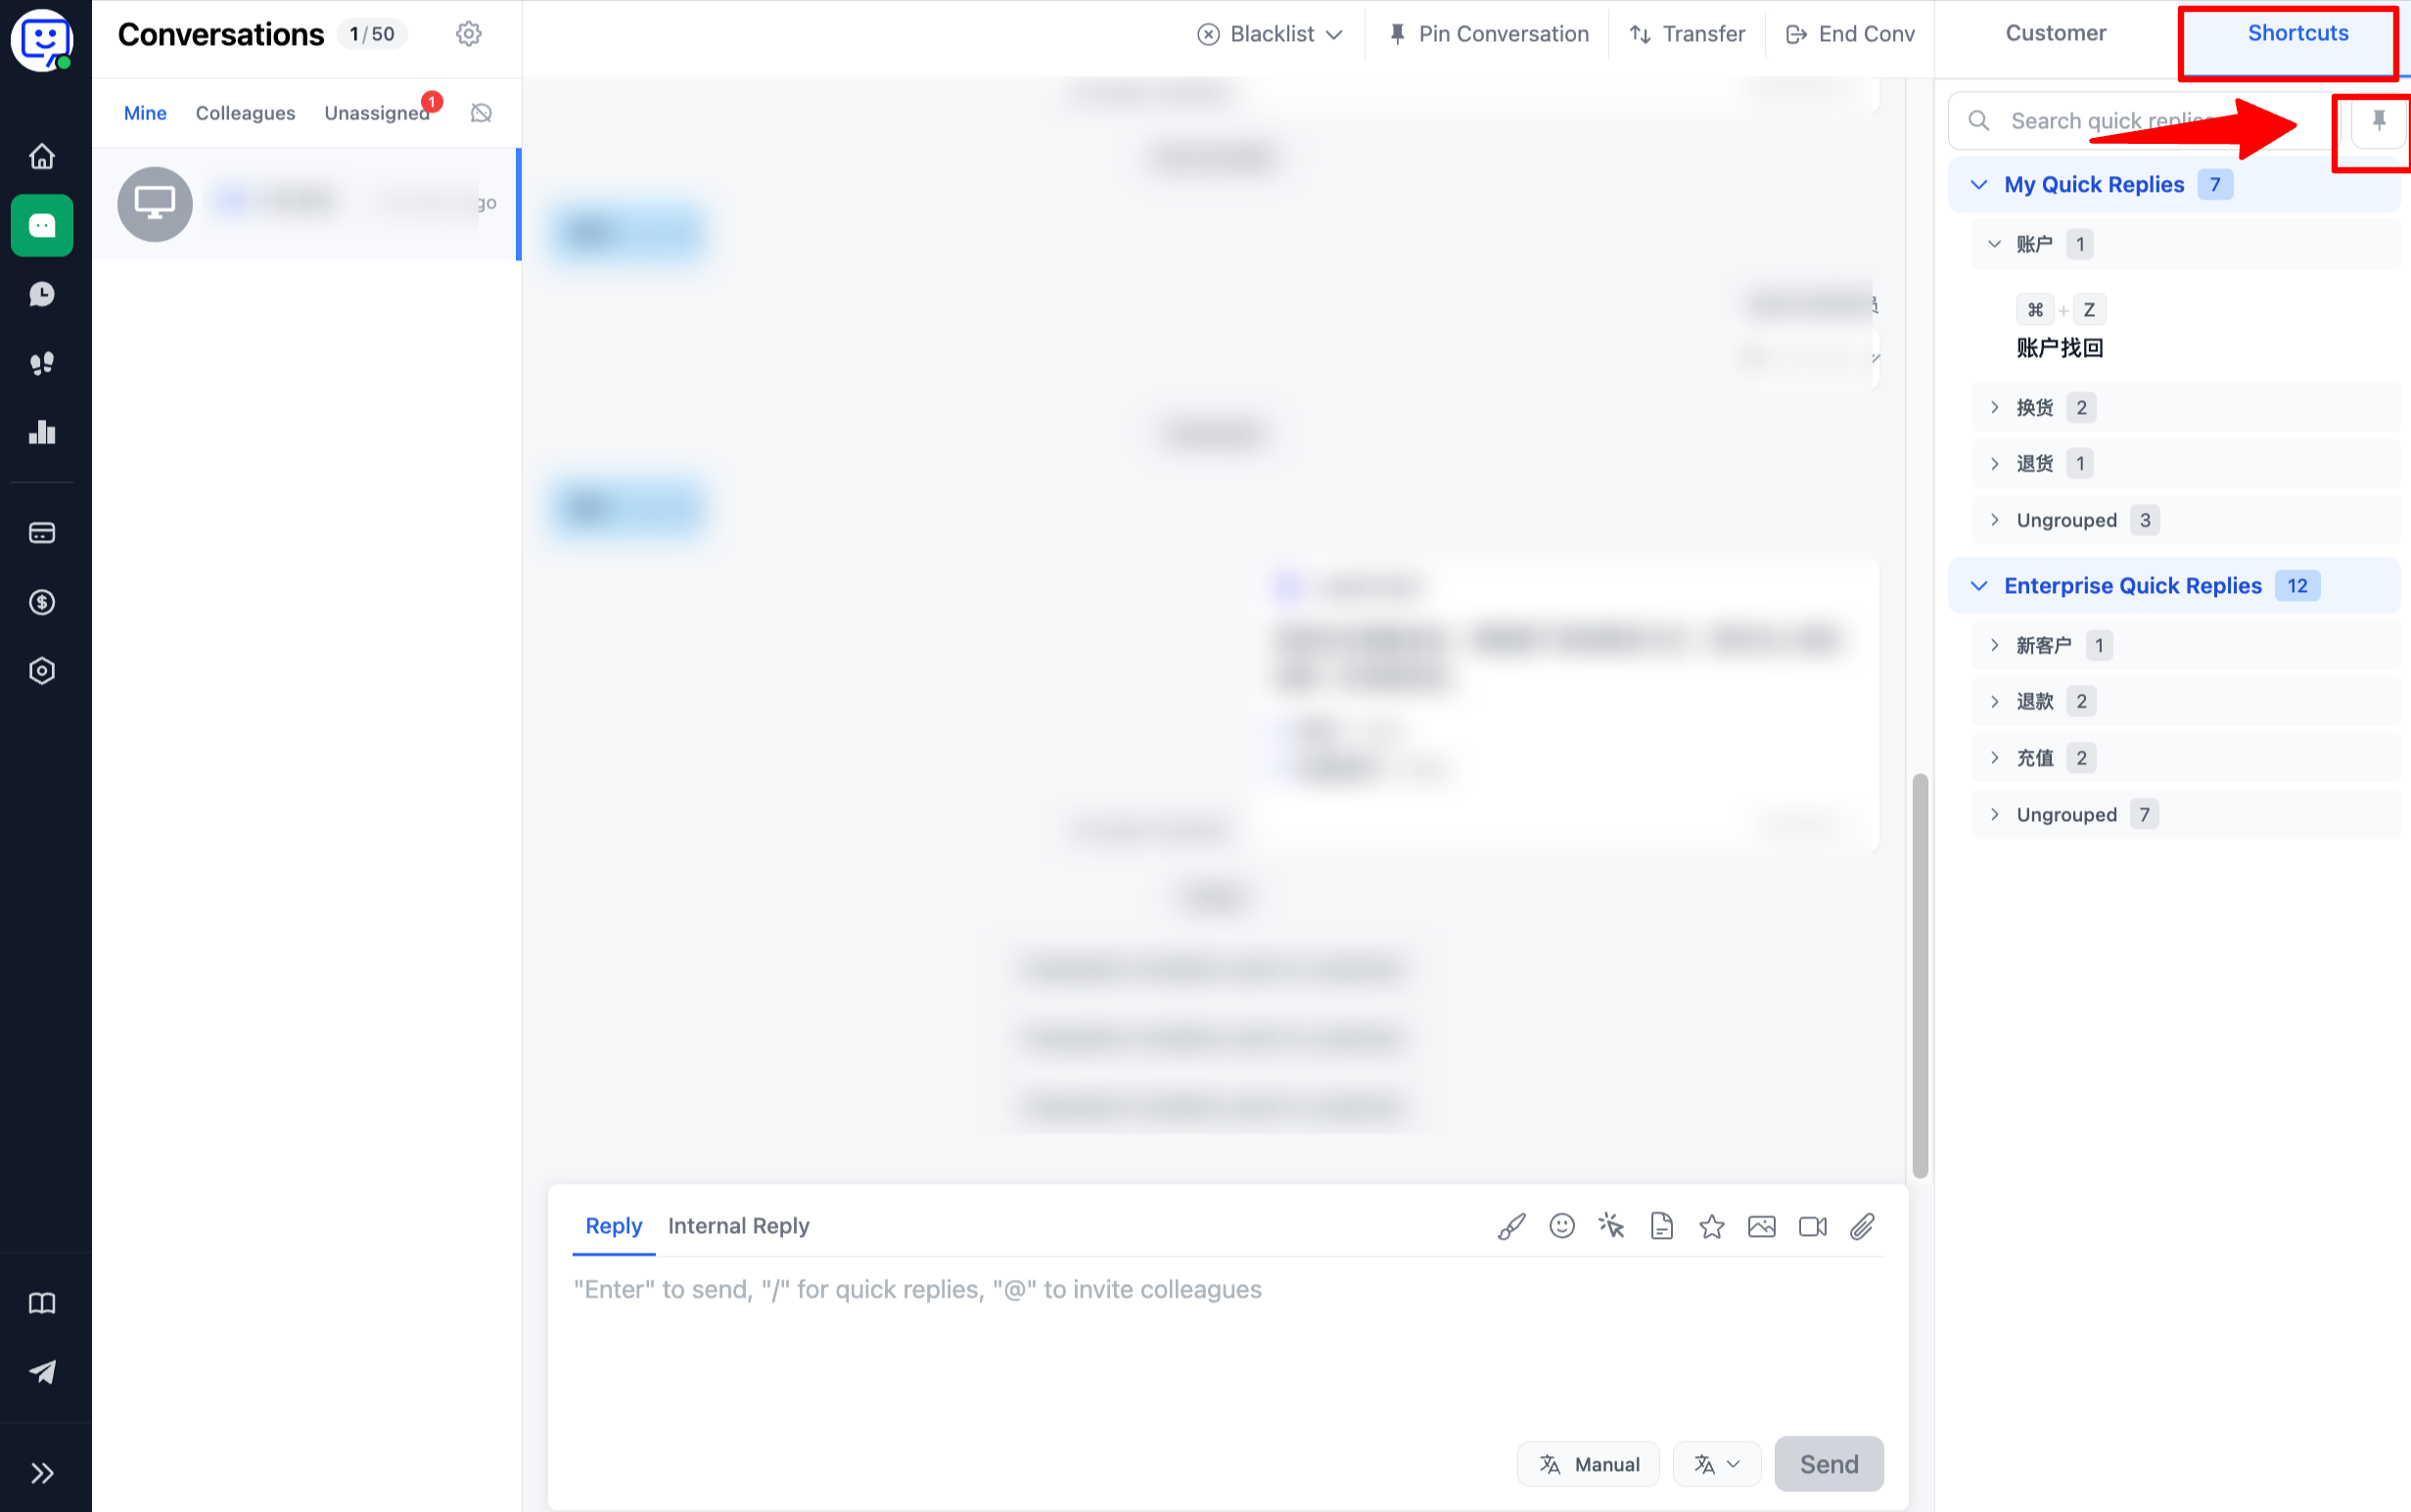
- Above the conversation, you'll find various actions: block visitor, pin conversation, transfer to another agent, and end conversation.
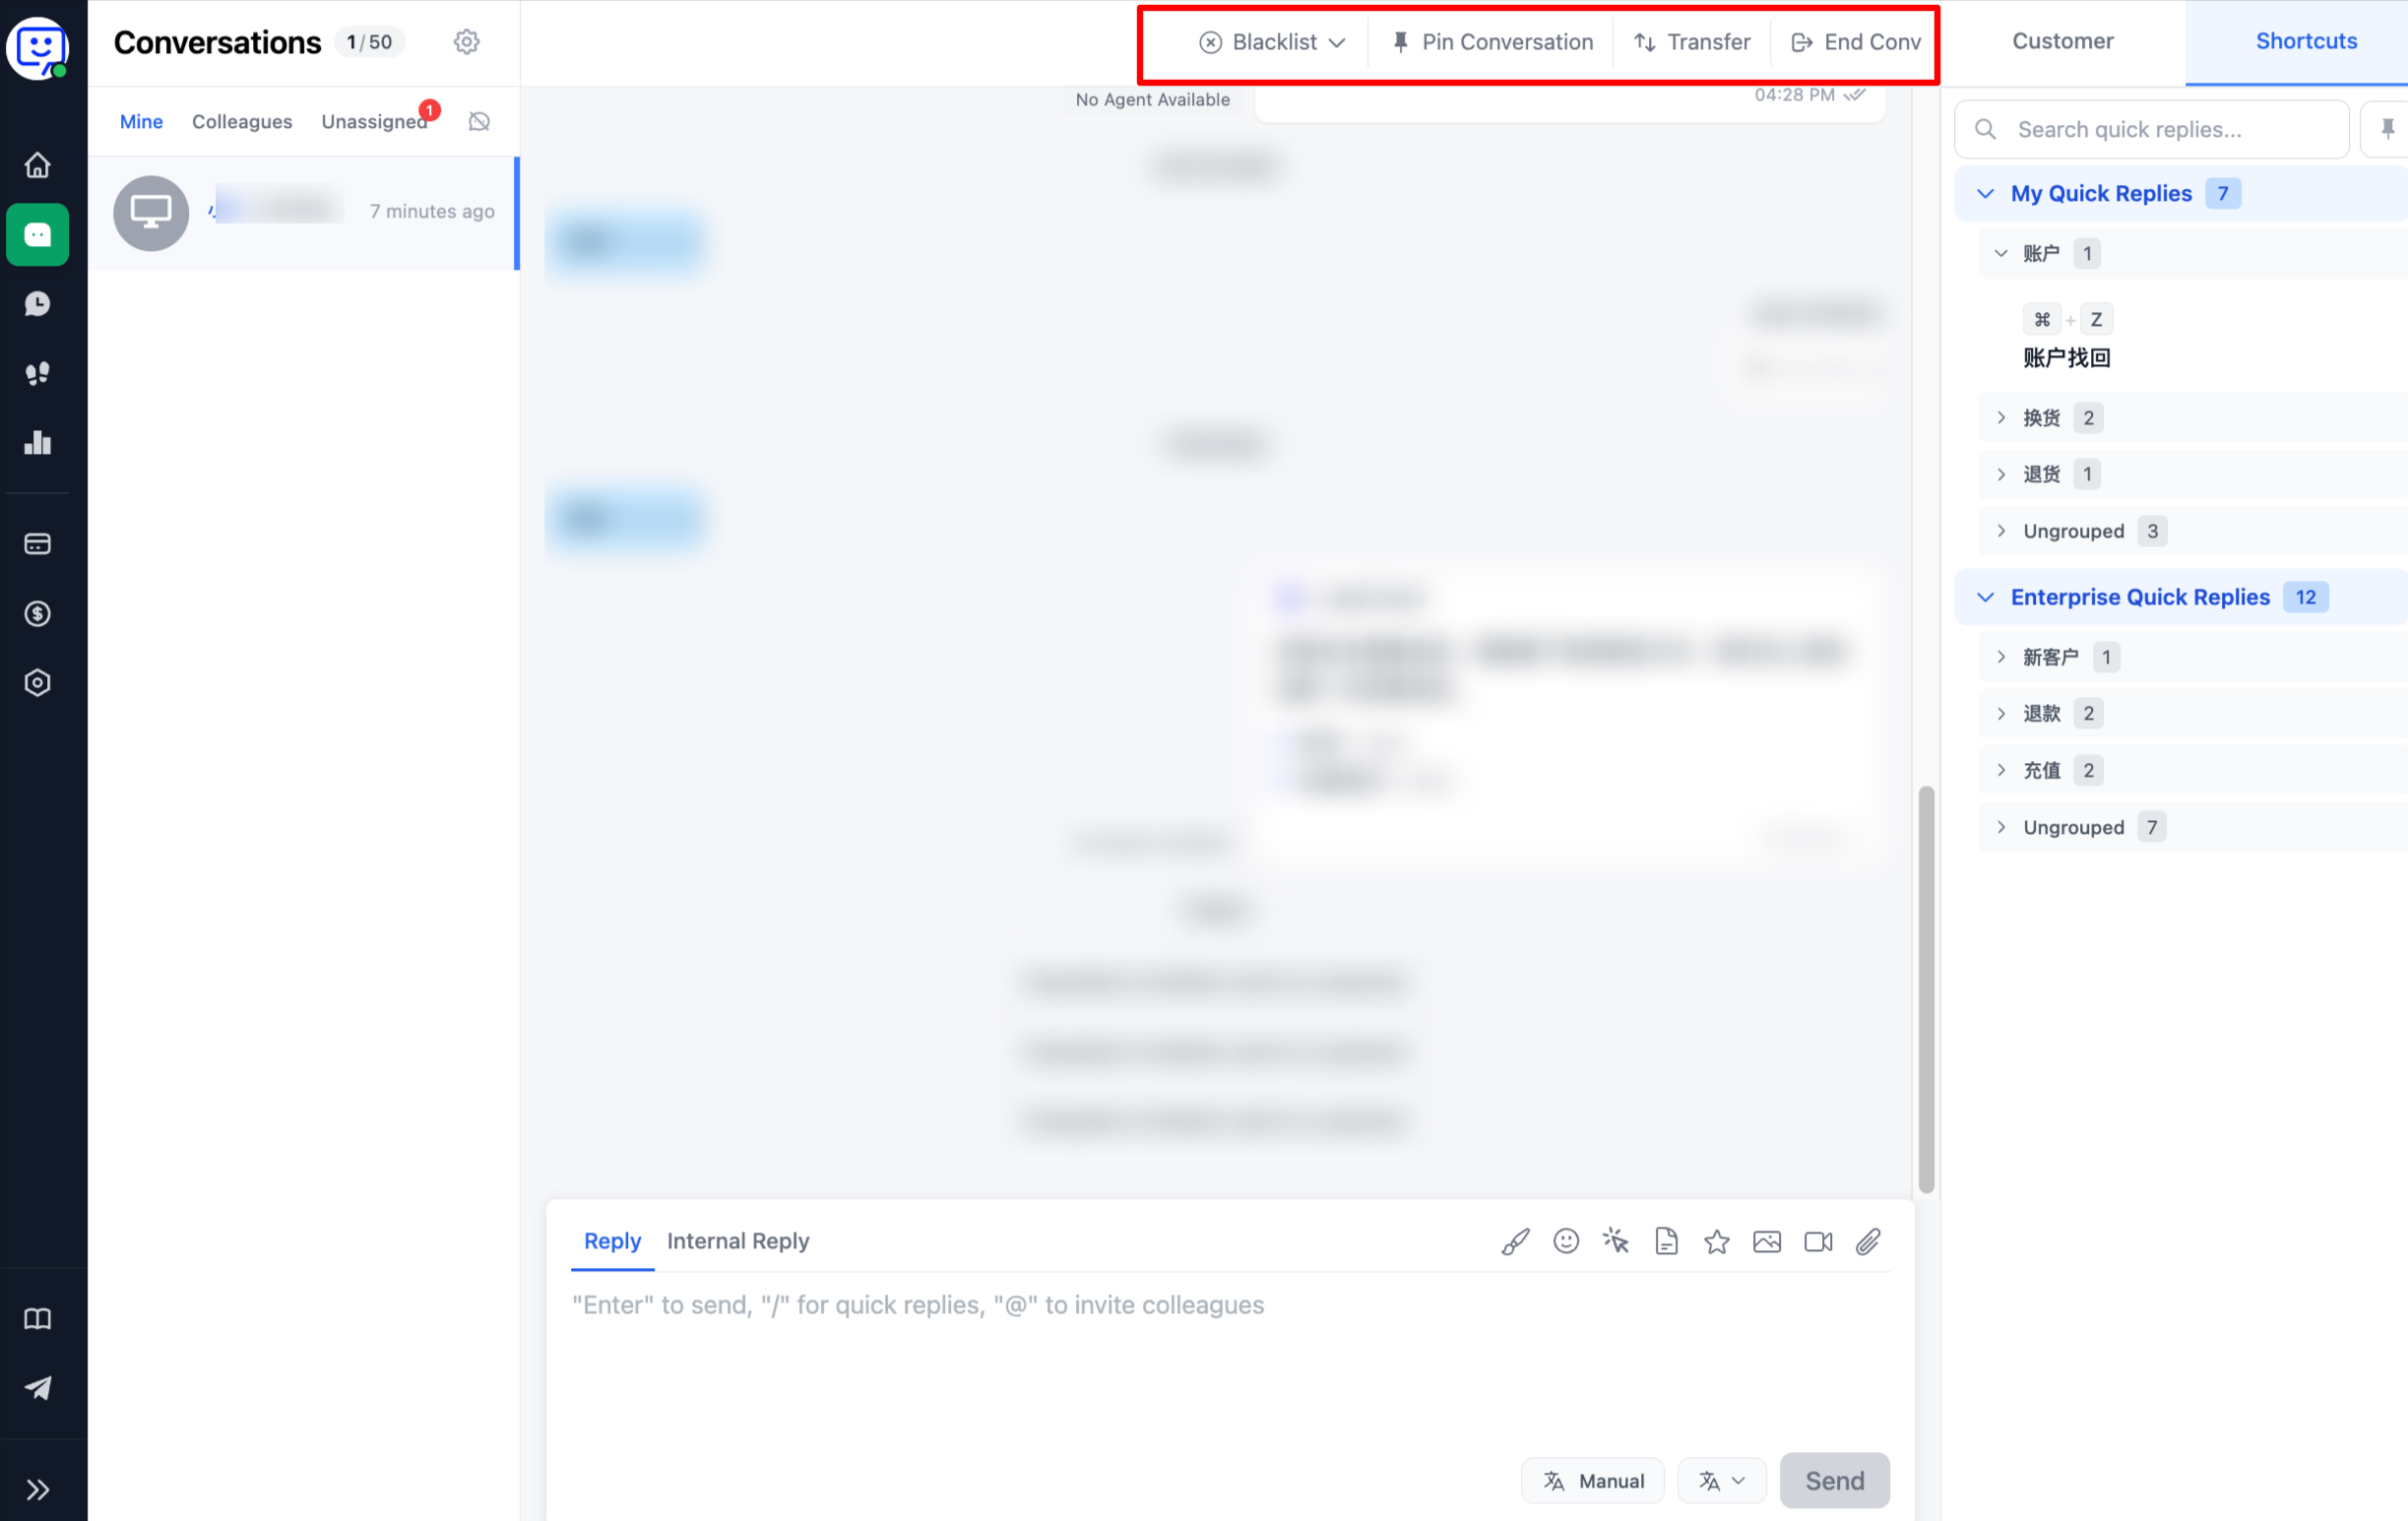
- In conversation page settings, agents can adjust notification preferences, set a personal welcome message, update their profile card, and configure keyboard shortcuts.

🎉 Congratulations!
You've now learned the basics of using Qiabot to communicate with your customers.
Qiabot has many more features waiting for you to explore.